Your expensive monitors aren’t the problem; they’re accurately revealing the deep-seated physics flaws in your room’s acoustics.
- Poor translation is caused by physical phenomena like boundary interference (SBIR), untreated first reflections, and low-frequency standing waves (room modes).
- Solving these issues requires a systematic, physics-based approach to diagnosis and treatment, not more gear purchases.
Recommendation: Diagnose and treat your room’s physical acoustic issues using the methods in this guide *before* considering any further equipment upgrades.
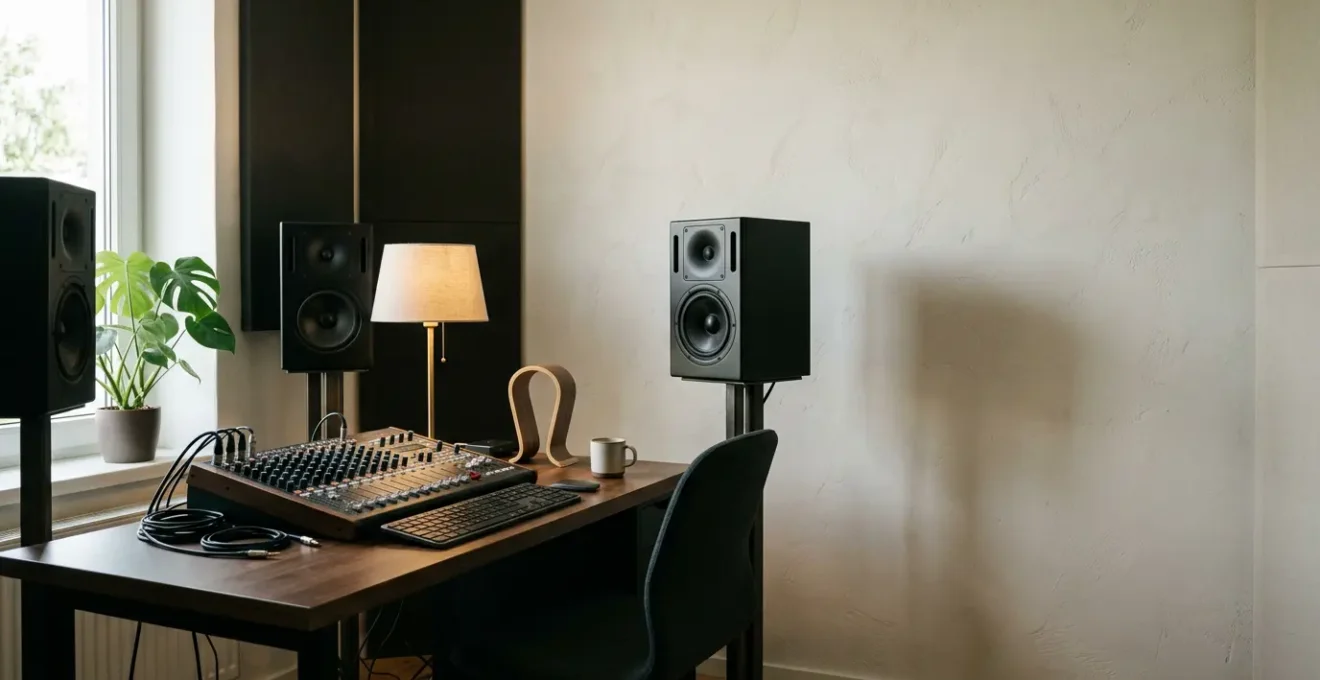
You’ve spent a small fortune on a pair of professional studio monitors. You trust them. In your room, the kick drum hits hard, the bass is full, and the stereo image is wide. Yet, when you play that same mix in your car, on your phone, or at a friend’s house, it falls apart. The bass disappears, the vocals get buried, or the entire track sounds muddy and congested. The immediate, frustrating conclusion for many bedroom producers is to blame the speakers. « If only I had the next model up, » the thinking goes, « my mixes would finally translate. »
This is the most expensive myth in audio production. The reality is that your monitors are likely not the liars; they are brutally honest truth-tellers in a room that is a master of deception. The problem isn’t your speakers; it’s the invisible, complex interaction of sound waves with the physical boundaries of your space. Issues like speaker-boundary interference, comb filtering from early reflections, and the chaotic energy of low-frequency standing waves are the true culprits behind poor translation. These are not gear problems; they are physics problems.
But here’s the good news: because they are physics problems, they have predictable, solvable solutions. Forget about quick fixes and miracle plugins for a moment. The path to a mix that translates reliably everywhere begins not with a credit card, but with a tape measure and a fundamental understanding of acoustics. It’s about systematically taming your room so it stops being an unwanted, out-of-tune instrument in your monitoring chain.
This guide will walk you through the science and practical steps to diagnose and treat the core acoustic issues that plague small rooms. We will move from foundational positioning to specific treatments, empowering you to make your monitors tell the same, accurate story, no matter where your mix is played.
To navigate this complex topic, we have structured this guide to build your knowledge systematically. From finding your ideal listening position to understanding the hierarchy of acoustic investment, each section tackles a crucial piece of the puzzle, providing you with the knowledge of a seasoned acoustic consultant.
Summary: Why Your Mixes Fail to Translate and How to Fix It
- How to Find the « Sweet Spot » in a Rectangular Room?
- Mirror Trick or Measurement: How to Locate First Reflection Points accurately?
- Why Certain Bass Notes Disappear Completely in Your Room?
- Egg Cartons vs Rockwool: The Acoustic Treatment Myth That Won’t Die
- Problem & Solution: Trusting Low-End Decisions When Mixing on Headphones
- Why Adding Mass is the Only Way to Stop Traffic Noise?
- Problem & Solution: Achieving Pro Quality in an Untreated Bedroom
- Which Professional Audio Gear Actually Retains Its Resale Value?
How to Find the « Sweet Spot » in a Rectangular Room?
Before you even think about acoustic panels, the single most powerful change you can make is positioning yourself and your speakers correctly. The « sweet spot » isn’t a matter of opinion; it’s the specific location in a room where the influence of destructive reflections and room modes is minimized. The goal is to hear the most direct sound from your monitors and the least amount of skewed information from the room itself. A common starting point is the 38% rule, which suggests placing your listening position 38% of the way into the room’s length from the front wall. This is a well-tested heuristic designed to avoid the primary nulls and peaks of the room’s lowest axial modes.
However, positioning also involves speaker placement relative to walls. This is governed by a principle called Speaker-Boundary Interference Response (SBIR). When a speaker is placed near a boundary (a wall), the sound reflects off that surface and combines with the direct sound. Depending on the distances, this combination causes specific frequencies to be cancelled out (a null) or reinforced (a peak). This is a primary reason why your bass seems inconsistent. According to GIK Acoustics’ research on SBIR, placing speakers between 1 to 3 feet from walls often creates significant nulls in the critical 100-300Hz band, the very foundation of punch and warmth in a mix.
The solution is a two-part process: either place the speakers as close to the wall as physically possible to push the cancellation frequency higher and out of the critical bass region, or move them far enough away (typically > 3-5 feet) to lessen the effect. For most bedroom producers, the first option is more practical. The final step is to arrange the speakers and your sweet spot into a perfect equilateral triangle, with the tweeters at ear height, ensuring the direct sound from both speakers arrives at your ears simultaneously.
Mirror Trick or Measurement: How to Locate First Reflection Points accurately?
Once your listening position is optimized, the next enemy to conquer is early reflections. These are sound waves that leave your speakers, bounce off a single surface (side walls, ceiling, floor, desk), and arrive at your ears a few milliseconds after the direct sound. This time delay smears your stereo image, causes comb filtering (a series of sharp peaks and dips in the frequency response), and reduces clarity. The most critical of these are the « first reflection points. »
The most common DIY method for finding these points is the « mirror trick. » It’s a simple but effective technique: while sitting in your listening position, have a friend slide a small mirror along the side wall between you and the speaker. The exact spot where you can see the reflection of the speaker’s tweeter in the mirror is your first reflection point. You must repeat this for the other side wall, the wall behind you, and, crucially, the ceiling area above and slightly in front of your head (known as the « cloud » position).
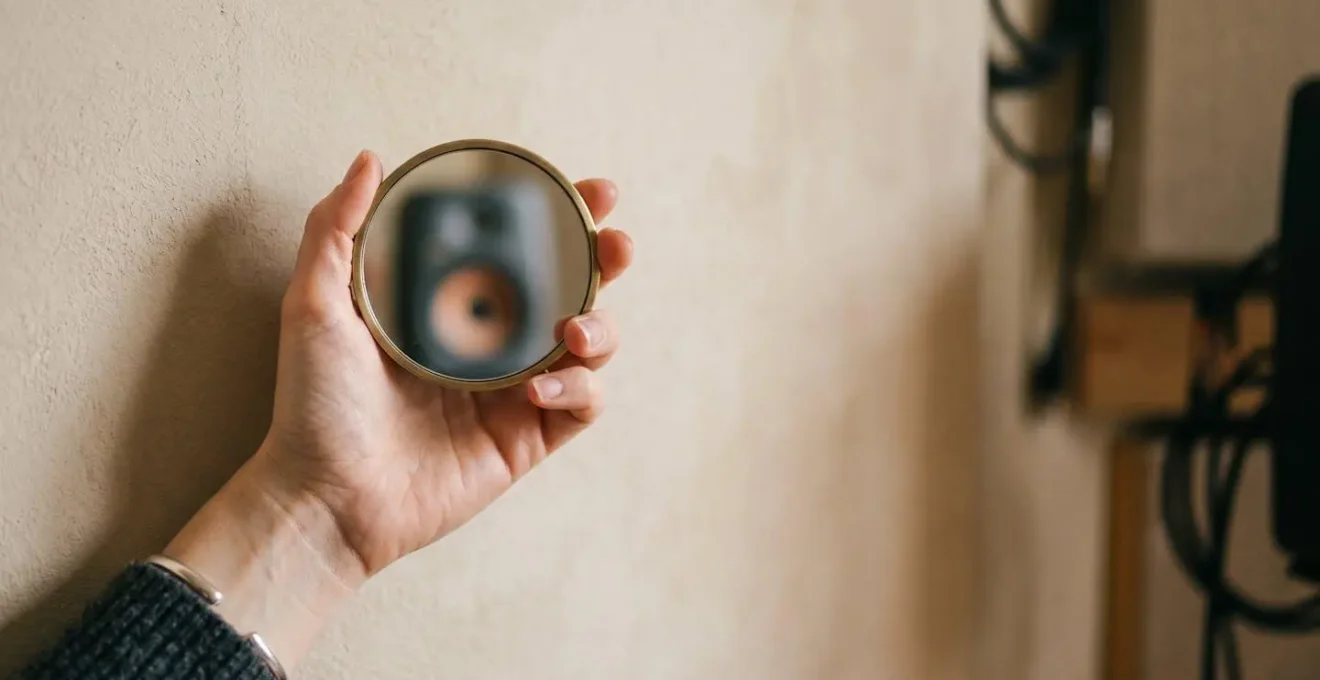
While the mirror trick is an excellent starting point for any bedroom producer, professional acousticians use a more precise method. As outlined in professional guides on reflection mapping, using measurement software like Room EQ Wizard (REW) provides a surgical level of accuracy. By analyzing a measurement microphone’s impulse response, you can see the exact timing and amplitude of every reflection arriving after the direct sound. This Energy-Time Curve (ETC) not only confirms the side wall and ceiling points but also reveals other culprits the mirror trick misses, such as reflections from your desk or floor. This data allows you to prioritize treatment, focusing absorption on the most damaging reflections that arrive within the first 20 milliseconds.
Why Certain Bass Notes Disappear Completely in Your Room?
You play a descending bassline, and one note (say, a G) is thunderous, while the next (an A) is almost completely gone. This isn’t your bass guitar or synth; it’s the physics of standing waves, also known as room modes. In any enclosed rectangular room, sound waves of specific frequencies, whose wavelengths are directly related to the room’s dimensions (length, width, height), will reflect back and forth between parallel surfaces. When the reflected wave is perfectly in phase with the original, it creates a « peak » (an antinode) where that frequency is excessively loud. When it’s perfectly out of phase, it creates a « null » (a node) where that frequency is cancelled out and becomes nearly inaudible.
This phenomenon is most powerful and problematic in the low-frequency spectrum. Indeed, research from GIK Acoustics shows that the 20 Hz to 200 Hz region is where the most fundamental and powerful room resonances occur in typical residential-sized rooms. Your listening position might be in a null for 80Hz but a peak for 120Hz, making it impossible to make accurate judgments about your low end. You’ll either under-compensate for the null (making your mix boomy everywhere else) or over-compensate for the peak (making it thin everywhere else).
To identify these problematic zones, you can perform a « bass crawl. » This diagnostic involves playing a slow sine wave sweep from 30Hz to 200Hz and physically moving around your room. You will hear for yourself how the volume of a single frequency changes dramatically from one spot to another. Note the areas of extreme peaks (usually near walls and corners) and deep nulls (often in the middle of the room or at fractional divisions of the dimensions). This audible map of your room’s low-end response is the first step toward effective bass trapping strategies, which are designed to absorb energy at high-pressure zones (corners) to reduce the severity of these modes.
Egg Cartons vs Rockwool: The Acoustic Treatment Myth That Won’t Die
Once a producer identifies reflection points and bass issues, the first impulse is often to « soundproof » the room. This leads to one of the most persistent and useless myths in home studio acoustics: tacking up egg cartons or thin, cheap foam. These materials do virtually nothing to solve the core problems of mix translation. They fail because they lack the two properties essential for acoustic control: mass for isolation and gas flow resistivity for absorption.
Egg cartons are thin, light, and non-porous. They don’t absorb sound; their shape only slightly scatters (diffuses) the very highest frequencies in an uncontrolled, unpredictable way, while leaving the critical mid-range reflections and all bass frequencies completely untouched. Professional acoustic absorption, on the other hand, works by converting sound energy into heat. Materials like dense fiberglass (Owens Corning 703) or Rockwool are effective because they have an optimal density and fiber structure. As sound waves cause air molecules to vibrate and pass through the material’s porous structure, friction is created, and this friction converts the kinetic energy of the sound wave into a minuscule amount of heat. This process of energy conversion is what « absorbs » the sound.
For this to be effective against the mid-range reflections that smear your stereo image, panels need to be thick. A panel of Rockwool or rigid fiberglass should be at least 4 inches (10cm) thick to have a meaningful impact on the frequencies that cause problems. For bass frequencies, which have much longer wavelengths, even thicker « bass traps » are required, often 6 inches or more, and placed in corners where low-frequency pressure builds up. While it may seem like a lot, according to Sonarworks acoustic research, significant, audible improvement in a critical listening environment often requires at least 50% of the wall and ceiling surfaces to be strategically covered with appropriate treatment.
Problem & Solution: Trusting Low-End Decisions When Mixing on Headphones
Confronted with an untreated room, many producers turn to headphones as a « perfect » monitoring solution, free from the room’s influence. While headphones are an indispensable tool for detail work and editing, relying on them exclusively for mixing—especially for the low end—presents its own set of translation challenges. The headphone experience is fundamentally different from listening to speakers in a room. The lack of physical chest-feel from bass, the exaggerated stereo separation (no « crossfeed »), and the unique frequency response of each headphone model can lead to just as many translation errors as a bad room.
The choice of headphone type is critical. Open-back headphones are generally preferred for mixing as they offer a more natural, speaker-like frequency response and a wider soundstage, reducing listener fatigue. Closed-back headphones, while great for tracking due to their isolation, often have a hyped or inaccurate bass response due to the pressure buildup in the sealed ear cup.
To help you choose and understand the trade-offs, here is a comparison based on an analysis from audio experts at iZotope:
| Characteristic | Open-Back Headphones | Closed-Back Headphones |
|---|---|---|
| Bass Response | More natural, less hyped bass presentation similar to speakers | Enhanced bass due to sealed chamber, can cause over-compensation |
| Soundstage | Wider, more speaker-like stereo imaging with natural crossfeed | Narrower, more intimate soundstage concentrated in head |
| Isolation | No isolation – room noise bleeds in, sound leaks out | Good isolation for tracking and noisy environments |
| Mix Translation | Better for critical mixing decisions, more honest frequency balance | Useful for checking details but can mislead on low-end balance |
| Listening Fatigue | Less fatiguing for long sessions due to natural acoustics | More fatiguing – sealed pressure on ears and emphasized frequencies |
| Best Use Case | Primary mixing tool, mastering, critical listening in quiet spaces | Tracking, editing, mixing in untreated rooms with noise issues |
Even with the best open-back headphones, you need a system to calibrate your perception of the low end. The most effective method is consistent A/B referencing. By importing 3-5 commercially successful tracks from your genre into your session, you can constantly compare your mix’s low-end energy and balance against these proven references. A powerful technique is to use an EQ to filter both your mix and the reference tracks, allowing you to listen *only* to the sub-150Hz region. This focused listening helps you match the kick drum’s weight and the bass’s presence to a known-good target, bypassing the specific quirks of your headphones.
Why Adding Mass is the Only Way to Stop Traffic Noise?
So far, we’ve discussed acoustic *treatment*, which is about controlling sound energy *inside* a room. A completely different challenge is acoustic *isolation* or « soundproofing, » which is about preventing sound from entering or leaving the room. If your mixing is disturbed by traffic noise, neighbors, or family members, no amount of foam or Rockwool panels will solve the problem. Absorption panels are designed to tame reflections within the room; they are nearly transparent to the powerful, low-frequency sound energy from outside.
The only way to stop sound from transmitting through a barrier is to follow the Mass Law. This fundamental principle of acoustics states that to block sound, you need mass and density. The heavier and more solid a wall is, the more energy is required for a sound wave to make it vibrate and pass that energy to the other side. The law is logarithmic; according to the fundamental Mass Law principle in acoustics, for every doubling of a barrier’s mass or density, you get an increase of approximately 6 decibels in Sound Transmission Loss (STL). This is why a solid concrete wall blocks sound far more effectively than a standard stud-and-drywall construction.
For practical studio construction, this is applied using the Mass-Air-Mass principle. Instead of one very thick wall, it’s far more effective to build two separate, heavy walls (the mass) with an air gap in between. The air gap acts as a decoupler, making it difficult for vibrations to transfer from the first wall to the second. For maximum effectiveness, this construction can be enhanced with a viscoelastic damping compound (like Green Glue) between layers of drywall to convert vibrational energy into heat. However, this is all for naught if there are leaks. Sound, like water, will find the path of least resistance. Gaps under doors, around windows, and through electrical outlets will completely compromise even the most massive wall. True isolation requires a holistic approach: mass, an air gap, damping, and meticulous sealing of every single potential leak.
Problem & Solution: Achieving Pro Quality in an Untreated Bedroom
What if a full acoustic build-out is simply not an option? For the vast majority of producers in rented apartments or multi-use spaces, the goal isn’t perfection, but a « good enough » environment that minimizes the room’s worst offenses. A combination of clever positioning, a few key tools, and disciplined technique can yield surprisingly professional results in an untreated or minimally treated space.
The core strategy is to maximize the ratio of direct-to-reflected sound. If you can’t stop the reflections, you can at least make sure you’re hearing the direct sound from your speakers much more loudly. This is achieved with an extreme near-field monitoring setup. By placing your monitors much closer than usual (2-3 feet away) in a very tight equilateral triangle, the direct sound at your ears is significantly louder than any sound that has had time to bounce off a wall. Mixing at lower, conversational volumes (around 75 dB SPL) is also crucial, as this excites the room’s problematic bass modes far less, resulting in a more accurate low-end perception.
In this compromised environment, digital tools become invaluable allies. Room correction software, such as Sonarworks SoundID Reference, is a powerful solution. Using a measurement microphone, it analyzes the frequency response at your listening position and creates a corrective EQ curve to flatten out the peaks and dips caused by your room and speakers. With over 250,000 studios worldwide trusted by this technology, it’s a proven method for improving monitoring accuracy. It’s not a magic bullet—it can’t fix nulls or long decay times—but it can dramatically improve the tonal balance you hear, leading to better translation.
Your 5-Step Room Acoustic Audit Plan
- Identify Contact Points: Use the mirror trick to locate all primary reflection points on side walls, the ceiling (cloud), and the wall behind you. These are the first areas to address.
- Collect Frequency Data: Perform a « bass crawl » with a slow sine wave sweep (30-200Hz) to inventory your room’s specific problematic bass frequencies and their corresponding high-pressure zones (peaks/antinodes).
- Check for Coherence: Compare your findings against the ideal setup. Is your listening position creating the best possible bass response? Is your speaker triangle equilateral and aimed correctly?
- Assess Stereo Image: Listen to a mono pink noise source. Does it appear as a stable, focused point in the center, or is it wide, vague, and wandering? This tests the smearing effect of your reflections.
- Draft an Integration Plan: Create a prioritized treatment plan based on your audit. The typical order of highest impact is: 1) Corner bass traps to address the collected frequency data, followed by 2) Absorption panels at the identified first reflection points.
Key takeaways
- Your room’s dimensions and your position within it are the primary cause of poor mix translation, not your speakers.
- Solving acoustic problems is a systematic process: first, optimize listener and speaker position, then treat reflections, and finally, manage low-frequency modes.
- True acoustic absorption relies on thick, porous materials (like Rockwool) to convert sound energy to heat; thin foam and egg cartons are ineffective.
Which Professional Audio Gear Actually Retains Its Resale Value?
Monitoring accuracy these days comes down to three things – the first is your studio monitors, second is your room acoustics, and third are your ears.
– Professional mix engineer and GRYD co-founder, Swee Lee Studio Monitor Advice Interview
This entire guide has been built on a single premise: understanding and treating your room is a far better investment than endlessly upgrading your monitors. Now that you understand the physics, it’s possible to create a smart investment hierarchy—a spending order that delivers the highest return on investment (ROI) in terms of mix translation. It’s about spending money on things that solve real problems and hold their value over time.
The world of audio gear is rife with rapidly depreciating assets. Software becomes obsolete, and digital hardware is quickly surpassed by newer models with better specs and different computer connection standards. However, some categories of gear are based on fundamental physics and manufacturing quality that doesn’t change. These items, when chosen wisely, can be considered long-term investments that lose very little—and sometimes even gain—value over decades. A well-treated room is the ultimate investment, as it makes every single piece of gear you own perform better.
Based on this philosophy, here is a prioritized spending list focused on maximizing your mix translation and protecting your investment:
- Priority #1: Acoustic Treatment (Highest ROI). A few hundred dollars spent on DIY Rockwool panels or a thousand on commercial bass traps and absorbers will improve your translation more than a ten-thousand-dollar speaker upgrade in an untreated room. This is the single most important investment.
- Priority #2: Room Calibration System. A system like Sonarworks SoundID Reference is the next most impactful step, correcting the final frequency aberrations at your listening position.
- Priority #3: A Transparent Monitor Controller. Often overlooked, a high-quality controller ensures what you hear isn’t being colored by cheap electronics and allows for accurate level-matching when comparing with other speakers.
- Priority #4: Studio-Standard Reference Monitors. Now, and only now, do we consider the speakers themselves. By choosing models with a multi-decade track record (like those from Yamaha, Genelec, or ProAc), you are buying a known quantity that holds its resale value exceptionally well.
- Priority #5: High-Quality Microphones. Like monitors, flagship microphones from brands like Neumann or Shure are based on transducer physics that doesn’t become obsolete. They are lifetime investments.
Notice what’s last on the list: audio interfaces and digital hardware. While necessary, these should be seen as functional tools with a limited lifespan, not long-term investments. By putting your money into acoustics first, you build a reliable foundation that makes every subsequent purchase more effective.
By systematically addressing the physics of your room, you empower your expensive monitors to do the job you hired them for. Start with measurement and positioning, invest intelligently in treatment, and you will finally achieve mixes that not only sound great in your studio but translate with confidence to the outside world.