In summary:
- Treat your DAW session not as a messy folder, but as a piece of architecture. An intentional system makes creativity faster and easier.
- A well-built mixing template is your single most powerful tool, automating setup and enforcing consistency across all your projects.
- Systematic organization—from color-coding and track naming to stem preparation—eliminates cognitive load and prevents catastrophic future problems.
- Effective CPU management and mix translation are not afterthoughts; they are integral parts of a robust project architecture.
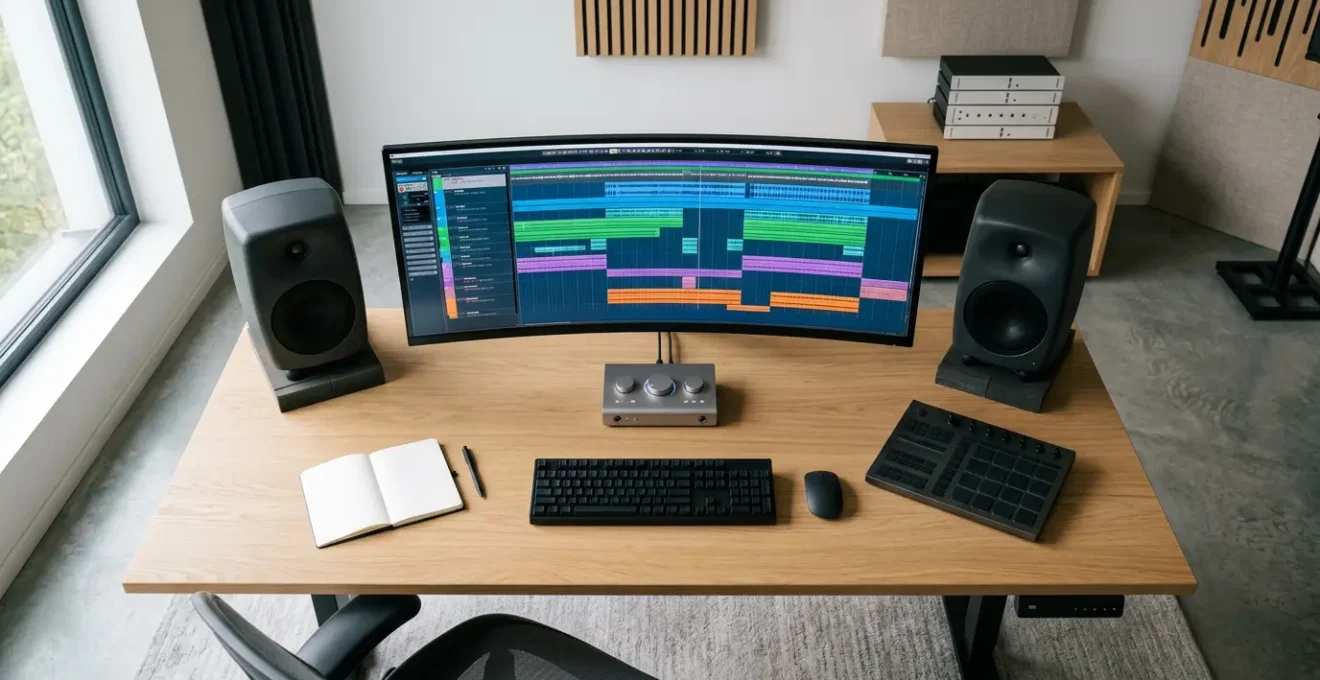
A 50-track session. It starts as a burst of inspiration—layers of synths, stacked vocals, intricate drum patterns. But soon, the project collapses under its own weight. You spend more time searching for « Audio_04_final_final_2 » than you do creating. Your CPU sputters, your creative flow evaporates, and the session becomes a source of anxiety rather than joy. This is a universal experience for home producers, where the line between powerful tools and overwhelming clutter is dangerously thin.
The common advice is to « be more organized. » You’re told to use colors, name your tracks, and create groups. While not wrong, this advice treats the symptom, not the cause. It’s like telling someone with a cluttered house to simply tidy up. It offers temporary relief but doesn’t prevent the mess from returning. The real problem isn’t a lack of tidiness; it’s a lack of a foundational system.
But what if the solution wasn’t about housekeeping, but about architecture? This guide reframes session organization as an act of intentional design. We will move beyond simple tips and into the realm of project architecture—a systematic approach that makes creative decisions faster, technical problems predictable, and future collaboration effortless. It’s about building a scalable framework that supports your creativity instead of stifling it.
We will deconstruct this architectural approach piece by piece, from the visual language of color to the structural integrity of a modular template. You will learn not just *what* to do, but *why* it works, transforming your workflow from reactive and chaotic to proactive and controlled.
This article provides a complete blueprint for building robust session architecture. The following sections detail each critical component, from foundational setup to final delivery and quality control.
Table of Contents: A Producer’s Blueprint for Session Architecture
- Why Color-Coding Your Tracks Saves Hours of Mixing Time?
- How to Build a Mixing Template That reducing Setup Time by 50%?
- Freeze or Bounce: Which Method Best Preserves CPU Power for Plugins?
- The Naming Mistake That Makes Archiving Projects a Nightmare
- Sequencing & Planning: The Fastest Workflow for Comping Vocals into a Perfect Take
- How to Prep Your Stems So Producers Will Hire You Again?
- The Workflow Error That Makes Revisions Impossible on Analog Desks
- Why Your Mixes Translate Poorly Even With Expensive Monitors?
Why Color-Coding Your Tracks Saves Hours of Mixing Time?
Color-coding is often dismissed as a purely aesthetic choice, but its true power lies in its ability to dramatically reduce cognitive load. Every moment you spend visually scanning a grey, uniform track list to find the kick drum or a specific vocal harmony is a moment stolen from a creative decision. A well-designed color system transforms your session from a wall of text into an intuitive, at-a-glance map. Your brain begins to associate « blue » with drums or « yellow » with vocals, allowing you to navigate dozens of tracks by instinct rather than conscious effort.
This isn’t just about speed; it’s about maintaining creative momentum. When you can instantly locate and manipulate entire instrument groups based on color, you stay in the « flow state » of mixing. The system works for you, not against you. The key is consistency. A random color scheme is just as chaotic as no color scheme at all. You need to develop a personal, logical palette and apply it religiously across every project.
A systematic approach to color involves more than just tracks. Extending your color scheme to markers (for song sections like Verse, Chorus) and regions creates a comprehensive visual timeline. You can see the entire song structure from a zoomed-out view, making arrangement changes and automation passes far more efficient. This visual architecture is the first and simplest layer of an organized session, but its impact on workflow efficiency is profound.
- Stick to a maximum of eight colors to avoid visual confusion and maintain clarity.
- Use bold and distinct colors that stand out well in your mix session for instant recognition.
- Create a color legend and use it consistently across all your mix sessions to develop muscle memory.
- Color-code both tracks and their corresponding channel strips for a unified visual workflow.
- Apply the same color scheme to markers and regions to visually map the entire song structure.
How to Build a Mixing Template That reducing Setup Time by 50%?
If color-coding is the visual language of your session, the mixing template is its architectural blueprint. Starting every new project from a blank slate is the single greatest waste of time and creative energy in music production. A well-designed template is not just a collection of empty tracks; it’s a pre-built, fully-routed production environment that automates 90% of your technical setup, allowing you to start creating within minutes.
The philosophy behind a powerful template is modularity and scalability. Instead of creating a rigid structure, you build a flexible one with pre-configured instrument groups (Drums, Bass, Guitars, Keys, Vocals), each routed to its own bus. On these busses, you can pre-load your favorite starting-point plugins: a touch of compression on the drum bus, a basic de-esser on the vocal group, and a spectrum analyzer on the master fader. You also pre-create your essential reverb and delay sends, so they are ready to use instantly.
This approach transforms your workflow. A new idea doesn’t require 30 minutes of routing and setup. You simply drag the audio or MIDI into the appropriate, pre-colored, pre-routed track, and it immediately exists within a logical mix structure. This system must be scalable, allowing you to easily add more tracks to a group without having to rethink your entire routing scheme.

As the visual above suggests, think of your template as a hierarchical system of modules. Each module (e.g., the « Vocal » module) is a self-contained unit with its own tracks, processing bus, and effects sends. This organization not only saves time but also enforces consistency in your sound, making your entire catalog more cohesive. As the Composer Skill Builder professional workflow analysis notes, this level of preparation is standard among top-tier professionals.
Professional composers often have this down to a 10-15 minute routine, regardless of project complexity.
– Composer’s Guide to Professional Delivery, Composer Skill Builder professional workflow analysis
Freeze or Bounce: Which Method Best Preserves CPU Power for Plugins?
As your track count grows, so does the demand on your computer’s CPU. Managing this resource is a critical part of session architecture. The two primary tools for this are Track Freezing and Bouncing (also known as Committing or Rendering in Place). Choosing the right one at the right time is crucial for maintaining a smooth workflow without sacrificing creative flexibility.
Track Freezing is a temporary, non-destructive process. It renders the output of a track’s plugins into a temporary audio file, disabling the plugins to free up CPU power. The key advantage is its reversibility; you can « unfreeze » the track at any time to tweak the original plugins. This makes it ideal during the creative and arrangement phases when you are still experimenting with sounds and effects. It offers immediate CPU relief with maximum flexibility.
Bouncing to Audio, on the other hand, is a permanent commitment. This process creates a brand-new audio track from the output of the original track and its plugins. Once bounced, the original track and its processor-hungry plugins can be disabled or deleted. This introduces what we can call ‘intentional friction’—it forces you to commit to a sound. While this seems restrictive, it is incredibly powerful for locking in decisions and moving forward in the production process. It’s best used when you are confident about a sound, such as a final synth patch or a heavily processed drum layer.
The choice depends on your project’s stage and your long-term goals. A detailed comparison reveals the specific strengths and weaknesses of each method, allowing you to build an intelligent CPU management strategy.
This technical decision is a core part of modern production, where managing digital resources is as important as any musical choice. A recent market analysis shows just how central digital workflows have become.
| Criteria | Freeze (Track Freezing) | Bounce (Audio Commit) |
|---|---|---|
| Flexibility | Fully reversible – unfreeze anytime to access original plugins | Permanent commitment – original plugin chain removed |
| CPU Impact | Temporarily frees CPU while frozen | Permanently frees CPU resources |
| Workflow Speed | Instant freeze/unfreeze in most DAWs | Requires export/re-import process |
| Long-term Compatibility | Depends on plugin availability in future sessions | Pure audio file – universal compatibility |
| Best Use Case | Creative phase requiring frequent adjustments | Pre-mix archiving and final delivery stages |
The Naming Mistake That Makes Archiving Projects a Nightmare
The most catastrophic organizational failures often stem from the most overlooked detail: file and track naming. A session named « New_Song_Final_Mix_v2 » is a ticking time bomb. Months later, when a client asks for a revision or you want to repurpose a stem, this name tells you almost nothing. Is it your song or someone else’s? What is the tempo? What key is it in? This lack of information creates a massive barrier to archiving, collaboration, and future work.
Effective naming is not about creativity; it’s about creating a database-like standard that makes your projects instantly identifiable and searchable. A future-proof naming convention acts as metadata embedded directly in the filename. It should contain all the critical information you would need without ever having to open the project file. This is the information architecture of your production library.
This becomes even more critical in today’s environment, where collaboration and file sharing are constant. A comprehensive music production system market research study shows that 61% of creators prioritize multi-device and collaborative workflows. A standardized naming system ensures that when you send a project to a collaborator, they have all the essential info upfront. This discipline extends from the project file itself down to every individual track and bus within the session. « Audio 1 » is meaningless; « LD_VOX_Verse1_Tk3 » (Lead Vocal, Verse 1, Take 3) is actionable information.
Adopting a strict, consistent naming convention is a one-time decision that pays dividends for the entire lifetime of your career. It turns your project archive from a digital junk drawer into a valuable, easily accessible asset.
Action Plan for a Future-Proof Naming System
- Artist & Title First: Always begin with the Artist name and Song Title for universal identification (e.g., `Artist_SongTitle_`).
- Version Control: Add a version number (e.g., `v1_idea`, `v2_mix`, `v3_final`) to clearly track the project’s history.
- Critical Metadata: Include the BPM and Key Signature directly in the filename for quick reference (e.g., `128BPM_Aminor_`).
- DAW & Version: End with the DAW name and version to manage compatibility issues (e.g., `Logic11.logicx`).
- Assemble and Standardize: Use underscores as separators for a complete, readable filename: `Artist_SongTitle_v2_mix_128BPM_Aminor_Logic11.logicx`.
Sequencing & Planning: The Fastest Workflow for Comping Vocals into a Perfect Take
Vocal comping—the process of assembling a single, perfect vocal performance from multiple takes—is one of the most delicate and time-consuming tasks in production. A chaotic approach, with dozens of randomly recorded takes, can quickly devolve into a confusing mess that kills the emotional arc of the performance. An architectural mindset, however, can turn this task into an efficient and creative process.
The key is to apply a pre-planned recording and editing system. Instead of just hitting record repeatedly, you structure the session. This involves playlisting or layering takes in an organized way, using color-coding to differentiate between sections (verse takes in blue, chorus takes in red), and rating takes as you go. This creates a structured dataset, making the subsequent editing phase exponentially faster.
This methodical approach is detailed in an analysis by iZotope, which advocates for a specific two-phase system that balances natural flow with surgical precision.
iZotope’s Professional Vocal Comping Workflow
iZotope’s analysis of professional vocal comping reveals an effective two-phase approach: First, record one complete take from start to finish as a warm-up and template for flow. Then, narrow the focus to recording smaller sections (like a verse or chorus) with multiple takes for each. This method combines the natural continuity of a full performance with the precision of section-by-section optimization, significantly reducing comping time while maintaining emotional consistency across the final composite performance.
This workflow is a micro-system within your larger project architecture. It’s a testament to the idea that planning and structure don’t kill creativity; they create the conditions for it to flourish. You spend less time managing the chaos of takes and more time making artistic choices about the best emotional delivery for each phrase.

By organizing the raw material in this way, you can visually and audibly compare performances with ease, building the final composite take piece by piece like a sonic puzzle, ensuring every word carries the right intent and impact.
How to Prep Your Stems So Producers Will Hire You Again?
The final deliverable of your project architecture is often a set of stems for a collaborator, mixing engineer, or mastering engineer. This is the moment of truth for your organizational system. A poorly prepared set of stems—unlabeled, not starting at the same point, rendered with unwanted effects—is a clear signal of amateurism and can damage your professional reputation. As the Boris FX Music Production Guide states, organization is a hallmark of professionalism.
Nothing impresses a mixing or mastering engineer more than receiving a session that is tidy, clearly labeled, and logically structured.
– Boris FX Music Production Guide, Essential Music Production Tips for Beginners
Preparing professional stems is a non-negotiable skill. Stems are the individual or grouped audio files that make up your entire production (e.g., a « Drums » stem, a « Bass » stem, a « Lead Vocals » stem). The goal is to deliver a package that is « drag-and-drop » ready for the next person in the chain. This means every single stem file must start at the exact same point (bar 1, beat 1), regardless of where the instrument actually starts playing in the song. This is known as consolidation, and it ensures perfect alignment when imported into another DAW.
Furthermore, professional delivery often requires providing both « wet » stems (with your creative effects like delays and reverbs printed) and « dry » stems (with minimal processing). This gives the mixing engineer maximum flexibility to either use your creative vision as a starting point or build their own processing from a clean slate. A clear naming convention (as discussed earlier) is absolutely critical here. `TrackTitle_Drums_Wet.wav` and `TrackTitle_Drums_Dry.wav` leave no room for confusion.
Following a strict checklist for stem delivery is the final step in executing a flawless project architecture. It ensures your work is respected and that other professionals will be eager to work with you again.
- Consolidate all stems to start at bar 1, beat 1 for perfect alignment.
- Export at a consistent sample rate and bit depth, typically 44.1kHz/24-bit for music.
- Deliver both WET stems (with effects) and DRY stems (without) for flexibility.
- Include a detailed Project Info text file listing BPM, key, and contact information.
- Name stems clearly with the format: `Artist_SongTitle_StemName.wav`.
- Export MIDI files for all virtual instruments alongside their audio stems.
- Use lossless formats like WAV or AIFF exclusively; never MP3.
The Workflow Error That Makes Revisions Impossible on Analog Desks
For producers working in hybrid studios, which combine the flexibility of digital with the sound of analog hardware, a unique architectural challenge arises: recall. How do you save and recall the precise settings of an analog compressor or EQ? A simple photo of the hardware is a start, but it’s not a robust system. The most common workflow error is failing to create a digital « imprint » of the analog processing, making true revisions nearly impossible without painstakingly resetting every piece of gear by hand.
The rise of these setups is undeniable; latest trends for 2024 indicate that hybrid studios are an increasingly popular choice for professionals seeking the best of both worlds. To manage this complexity, a specific workflow known as ‘Commit and Duplicate’ is essential. This system creates a bridge between the physical and digital domains, ensuring your analog processing decisions are permanently captured within the DAW session.
This workflow is a prime example of project architecture solving a complex, physical-world problem. It demonstrates how a systematic approach is superior to relying on memory or simple photos.
The Hybrid ‘Commit and Duplicate’ Recall Workflow
As documented by professionals, the workflow involves a strict sequence: For every track sent to outboard gear, you create a duplicate track lane in the DAW. After dialing in the hardware, you print (record) the processed signal back onto this new track. This creates a perfect, time-aligned audio capture of your analog settings. The original, unprocessed track is then deactivated but kept for safety. Crucially, the new track is named with extreme detail, documenting the entire signal chain (e.g., `LD_GTR_API512_1176_IN3`). This process, combined with high-resolution photos of the gear, creates an unbreakable documentation chain that makes analog settings perfectly recallable and enables instant A/B comparisons.
This disciplined practice is the ultimate form of future-proofing for a hybrid studio. It ensures that a mix can be revisited months later with 100% certainty, and that the unique sound of your analog hardware is safely archived within the digital project file. It’s a system that provides the freedom of analog with the safety net of digital.
Key Takeaways
- Adopt a « Project Architect » mindset: You are not just cleaning up, you are designing a system for creativity.
- Your DAW template is your single most valuable asset. Build it to be modular, scalable, and pre-loaded with your core tools.
- Systematic workflows for naming, stem delivery, and mix checking are not chores—they are insurance policies against future disasters and are hallmarks of professionalism.
Why Your Mixes Translate Poorly Even With Expensive Monitors?
You’ve spent thousands on high-end studio monitors, meticulously treated your room, and your mix sounds incredible… in your studio. But when you play it in the car, on a laptop, or through earbuds, it falls apart. The bass disappears, the vocals get buried, or the stereo image collapses. This is a classic mix translation problem, and it’s rarely the fault of the gear. It’s a failure of the final, critical stage of your project architecture: systematic, multi-platform quality control.
Relying on a single, high-fidelity monitoring environment creates an « auditory bubble. » Your ears become accustomed to that perfect sound, and you make mixing decisions that only work in that specific context. The solution is to intentionally and systematically break out of that bubble throughout the mixing process. This means actively referencing your mix on the consumer-grade devices where 99% of people will actually hear it. According to an article from Boris FX, this isn’t just a good idea; it’s standard professional practice, as all successful music producers use references to stay grounded.
A robust translation check workflow involves more than a last-minute car test. It’s about building checkpoints into your process. This means comparing your mix to well-mastered commercial tracks (reference tracks) directly within your session, at the same loudness. It also means using tools to check for mono compatibility, where stereo information can cancel out and cause elements to vanish on systems like club PAs or Bluetooth speakers.
A structured workflow for translation testing is the final quality assurance step of your entire production. It ensures that the creative decisions you made within your perfectly organized session hold up in the unpredictable real world. Here is a practical workflow to integrate into your template:
- Test your mix systematically on different playback devices—laptop, phone, car, earbuds—at structured stages.
- Load commercial reference tracks directly into your session for objective A/B comparison at the same perceived loudness.
- Use a utility plugin to frequently check your mix in mono to identify phase cancellation issues.
- Solo frequency groups (Low End, Mids, Highs) to diagnose problems by range on different systems.
- Remember to check your mix on the devices where the majority of listeners will hear it, not just on your expensive monitors.
Begin implementing these architectural principles today to transform your production workflow from chaotic to creative, ensuring every session is a foundation for success, not a source of stress.