The secret to integrating modular synths isn’t acquiring more gear, but imposing strict creative limits and treating the synthesizer as a collaborator.
- Endless sonic options often lead to creative paralysis, preventing you from finishing actual songs.
- The most powerful workflow gives the modular a specific, defined role within a song’s structure, rather than expecting it to be an all-in-one solution.
Recommendation: Before you patch a single cable, decide on your module’s precise job—is it a texture generator, a percussive element, or a lead voice? Focusing on one sonic task at a time is the key to progress.
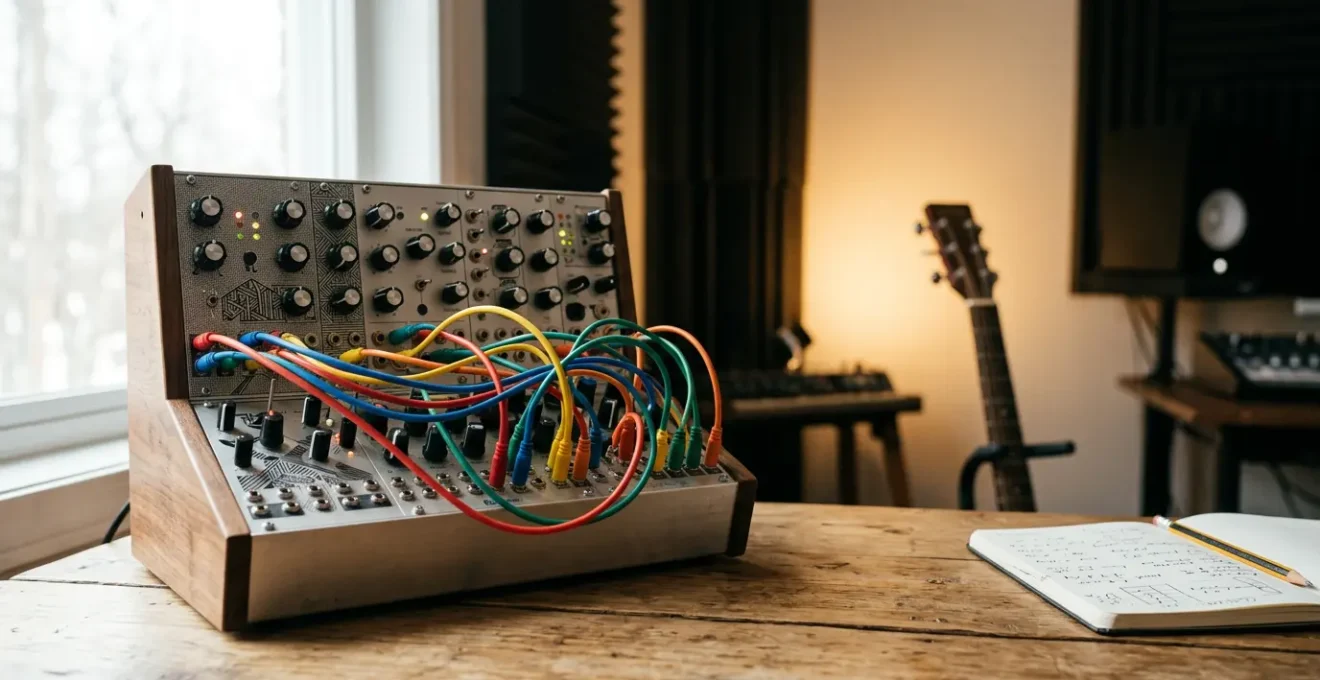
The blinking lights of a Eurorack system promise infinite sonic worlds. For many producers, however, that promise quickly morphs into a maze of patch cables, endless tweaking, and a hard drive full of fascinating but unfinished loops. You’re captivated by the potential but find it nearly impossible to channel that raw energy into the structured format of a complete song. The common advice—to just « jam and record everything » or to solve the problem by adding another VCA or a hyped-up new module—often deepens the creative rut rather than solving it.
This struggle is a sign that the core problem isn’t technical; it’s philosophical. We are trained to be in complete control in a DAW-based environment, where every note can be quantized and every sound recalled perfectly. Modular synthesis challenges this paradigm by introducing an element of chaos, physics, and unpredictability. The key to bridging this gap isn’t to tame the modular, but to enter into a structured conversation with it. It requires a shift in mindset from being a sole creator to becoming a director of emergent behavior.
But what if the true path to integrating your rig wasn’t about finding the perfect clocking module, but about deliberately ceding control? What if the solution to creative block was not more options, but intentional constraints? This guide moves beyond the technical basics of syncing your gear. Instead, it offers a composer’s framework for turning your modular synthesizer from an intimidating wall of possibilities into a focused and inspiring musical partner. We will explore how to define its role, process traditional instruments through it, and make conscious workflow choices that lead to finished, compelling music.
This article provides a structured approach to integrating the unpredictable nature of modular synthesis into your goal-oriented songwriting process. The following sections break down key philosophical and practical steps to help you finally finish those tracks.
Summary: Weaving Modular Synths into Cohesive Songs
- Why Buying More Modules Won’t Fix Your Creative Block?
- How to Process a Violin Through a Modular Rig for Cinematic Textures?
- Subtractive or Additive: Which Synthesis Style Fits Your Workflow?
- The Temperature Mistake That Ruins Analog Synth Recordings
- Sequencing & Planning: syncing Modular Rigs with a Live Drummer
- Why Cassette Emulation Is Essential for Warm Indie Textures?
- Why MPE (MIDI Polyphonic Expression) Is the Future of Synth Playing?
- Why Buying Vintage Synths Is Risky for New Producers?
Why Buying More Modules Won’t Fix Your Creative Block?
The allure of a new module is powerful. It promises a new sound, a new function, a spark that will surely unlock your next great idea. Yet, this cycle of acquisition often leads to a paradox: the more options you have, the harder it is to make a decision. This isn’t a personal failing; it’s a well-known phenomenon called the paradox of choice. For a songwriter, who needs to make hundreds of decisions to complete a track, this can be paralyzing. The problem is that gear acquisition syndrome (GAS) mistakes the tool for the intention. You don’t need another oscillator; you need a clear idea of what you want the oscillator to do.
Research consistently shows that creative blocks are rarely a result of limited tools. In fact, a 2024 study on digital music production confirms that music producers continue to suffer from creative blocks despite having access to advanced DAW features and a virtually unlimited palette of plugins. The challenge lies not in generating sound, but in shaping it with purpose. A modular system, with its near-infinite connectivity, amplifies this problem. Without a goal, you are simply navigating a sea of possibilities without a compass.
The solution is a counter-intuitive but powerful shift in mindset: embrace intentional constraints. Instead of asking « What can my system do? », ask « What do I need this song to do? ». Then, select a tiny fraction of your system to accomplish that one specific task. Perhaps you only use a single complex oscillator and a VCA to create an evolving drone. Or maybe you limit yourself to a single sequencer and a percussion module to build a rhythmic foundation. This approach forces you to be more creative with less, turning the synthesizer from a source of overwhelming options into a focused instrument. By defining a module’s role before you patch, you initiate a structured conversation, ensuring every sound serves the song’s narrative.
How to Process a Violin Through a Modular Rig for Cinematic Textures?
One of the most powerful ways to integrate a modular system into traditional songwriting is to stop thinking of it as just a sound source. Instead, treat it as the world’s most versatile effects processor. By feeding acoustic instruments—like a violin, piano, or your own voice—into your rig, you create a hybrid workflow that bridges the gap between the organic and the electronic. This process allows you to imbue a familiar, expressive performance with alien, evolving textures that would be impossible to achieve otherwise.
Imagine processing a simple, melancholic violin line. The initial signal, full of human nuance, enters your system. First, it might pass through a granular synthesizer module like Mutable Instruments Clouds or its successors. This module atomizes the audio into tiny grains, which can be re-pitched, reversed, and scattered to create a shimmering, ethereal cloud of sound that hangs behind the original melody. This approach offers a masterclass in timbral storytelling, where the texture itself tells a story of transformation and decay.
As the visual suggests, this is an intimate fusion of the acoustic and electronic worlds. From the granular cloud, the signal could then be routed to a resonant filter, controlled by a slow, random LFO to create gentle, sweeping movements. A touch of delay and reverb at the end of the chain places this new, complex texture in a vast, cinematic space. This isn’t just an « effect »; it’s a compositional act. You are co-creating with the instrument and the modular system, sculpting a sound that has the soul of a human performance and the complexity of a synthetic process.
Case Study: The Windowless Computational System
A prime example of this hybrid approach is the Windowless system, which demonstrates advanced real-time processing for the violin. Using custom sensors and digital signal processing, the system transforms the acoustic instrument’s sound into dense, rich textures. It shows how modular-style processing can dissolve and reshape an acoustic source while retaining the performer’s expressive control, proving that the boundary between instrument and processor can be beautifully blurred.
Subtractive or Additive: Which Synthesis Style Fits Your Workflow?
Within the world of modular, two foundational philosophies of sound creation dominate: « East Coast » and « West Coast » synthesis. Understanding the difference is crucial because it’s not just a technical choice—it’s a workflow decision that will profoundly shape your creative process. Choosing the style that aligns with your musical goals is a key step in having a productive, structured conversation with your instrument. East Coast synthesis is primarily subtractive, while West Coast is primarily additive or based on wavefolding.
Subtractive synthesis, pioneered by Bob Moog, is the more traditional approach. You start with a harmonically rich waveform (like a square or sawtooth wave) from a Voltage-Controlled Oscillator (VCO) and then « sculpt » it by removing frequencies with a Voltage-Controlled Filter (VCF). It’s like a sculptor starting with a block of marble and chipping away to reveal the form within. This method is predictable, intuitive, and excels at creating the foundational sounds of popular music: punchy basses, soaring leads, and lush pads. If your workflow is rooted in melody, harmony, and fitting sounds into a conventional mix, the subtractive approach is your natural ally.

West Coast synthesis, championed by Don Buchla, takes the opposite approach. You begin with a simple waveform (like a sine wave) and add harmonic complexity using techniques like frequency modulation (FM) and wavefolding. Instead of sculpting, you are « growing » the sound. This philosophy prioritizes timbre and texture over traditional pitch. The results are often unpredictable, metallic, and organic—perfect for creating otherworldly textures, generative sequences, and sounds that feel alive and constantly evolving. If your starting point is sound design and you see timbre as the central compositional element, the West Coast philosophy will feel like home.
This table breaks down the core differences to help you identify which philosophy best serves your songwriting needs, as detailed in an excellent analysis on Reverb.
| Aspect | East Coast (Subtractive) | West Coast (Additive/Wavefolding) |
|---|---|---|
| Philosophy | Sculpting from complex waveforms – removing harmonics | Building from simple waveforms – adding complexity |
| Core Method | VCO → VCF (filter removes content) → VCA | Waveshaping, FM, wavefolding add harmonics |
| Best For | Traditional song elements: bass, leads, pads | Alien textures, generative surprises, unique timbres |
| Predictability | Predictable, sits well in mix with acoustic instruments | Unpredictable, evolving, experimental sounds |
| Workflow Match | Songwriter – melody and harmony focused | Sound Designer – timbre as starting point |
| Key Modules | Resonant lowpass filters, ADSR envelopes | Complex oscillators, wavefolders, Low Pass Gates |
The Temperature Mistake That Ruins Analog Synth Recordings
One of the most romanticized—and frustrating—aspects of analog synthesizers is their inherent instability. Unlike their digital counterparts, analog oscillators are living, breathing circuits whose behavior is directly affected by their physical environment. The most significant environmental factor is temperature. Failing to account for this can lead to tuning nightmares, ruining takes and disrupting your creative flow. This isn’t a flaw to be fixed; it’s a physical reality you must incorporate into your workflow when you choose to work with analog gear.
Electronic components, especially the transistors and resistors in a Voltage-Controlled Oscillator (VCO), are sensitive to thermal changes. When you first power on your modular system, it’s cold. As electricity flows through the circuits, they generate heat, causing their values to drift. This drift directly impacts the pitch of your oscillators. A synth that was perfectly in tune at the start of a session can be noticeably sharp or flat 30 minutes later. For producers trying to layer modular sounds with digitally perfect instruments in a DAW, this can be maddening.
The key mistake is starting to record or tune your system immediately after powering it on. You must give your analog gear a proper « warm-up » period—typically 20-30 minutes—to allow it to reach a stable operating temperature. This simple act of patience ensures that your oscillators will be far more consistent throughout your recording session. As Oberheim’s technical documentation highlights, this is an expected behavior, not a defect. The company even clarifies the extent of this physical reality, as their technical team explains:
Electronic components are inherently sensitive to changes in temperature, and so this means that analog oscillators and filters are very susceptible to pitch variation. For example, if you were to open the synth and blow on the voice cards, you would hear them detune fairly wildly.
– Oberheim Technical Support, Analog Synths and Expected Variations Documentation
Even with a warm-up, some drift is inevitable. Official manufacturer specifications from Oberheim confirm that a ±5-10 cents variation per voice is normal. Instead of fighting it, embrace it. This slight, organic detuning is a huge part of what gives analog synths their « warm » and « fat » character. By understanding and planning for temperature drift, you turn a potential technical problem into a creative asset, a perfect example of ceding control to the machine’s physical nature.
Sequencing & Planning: syncing Modular Rigs with a Live Drummer
The idea of syncing a sprawling, semi-random modular rig with the organic, fluctuating tempo of a live drummer can seem daunting. It pits the rigid grid of the machine against the fluid groove of a human. However, this is where the concept of a hybrid workflow truly shines. The key isn’t to force the drummer to play like a machine or the modular to act like a human. Instead, it’s about establishing a clear hierarchy and a shared musical language. This requires planning and a central « brain » that can mediate the conversation.
One of the most effective methods is to use a master sequencer—like an MPC, Ableton Live with a CV interface, or an external hardware sequencer—as the central hub. This hub sends a master clock signal to both the modular system (to keep its sequencers in time) and to the drummer (as a click track in their headphones). This establishes a shared pulse. But a shared pulse is just the beginning. The real magic happens when you use the master sequencer to « conduct » the modular rig in a way that responds to the larger song structure, which the drummer is also following.
For instance, you can program your master sequencer to send gate signals to the modular only during specific sections of the song. The verse might feature a simple, repeating modular sequence, but for the chorus, the master sequencer can trigger a different, more complex sequence or activate a new set of voices. This allows the modular to feel like a dynamic part of the band, coming in and out, building and releasing tension in sync with the live instruments. It’s a way of imposing a traditional song structure onto the modular’s generative tendencies.
Case Study: MPC-Driven Eurorack in a Pop/Rock Context
A producer on the Modwiggler forum documented a successful workflow integrating Eurorack into traditional Pop/Rock song architecture using an MPC1000. By assigning different modular gate controls to the MPC’s pads, they could « play » the modular sequences in real-time alongside a live drummer. This allowed them to bring modular percussion in and out dynamically, proving that with proper planning and a central controller, a modular system can be seamlessly integrated into conventional song structures without sacrificing its unique character.
Why Cassette Emulation Is Essential for Warm Indie Textures?
In an age of pristine digital audio, a curious trend has emerged: the deliberate degradation of sound. At the forefront of this movement is cassette emulation. For producers aiming for the warm, saturated, and slightly unstable sound characteristic of indie, lo-fi, and ambient music, cassette emulation plugins or hardware have become an indispensable tool. This isn’t just about nostalgia; it’s a powerful technique for adding character, texture, and a sense of history to otherwise sterile digital recordings.
Cassette tape imparts a unique sonic footprint through a combination of « flaws. » These include:
- Saturation: When driven hard, tape gently compresses and distorts the signal, adding pleasing harmonic overtones that make sounds feel fuller and warmer.
- Wow and Flutter: These are slight, slow (wow) and fast (flutter) pitch variations caused by mechanical inconsistencies in the tape transport. This subtle, random detuning adds a liquid, dreamy quality that digital systems lack.
- Hiss and Noise: The inherent noise floor of the magnetic tape adds a layer of texture that can « glue » a mix together, filling in the sterile digital silence between notes.
This process is a form of timbral storytelling. By running a clean digital synth pad or a crisp drum machine through a cassette emulator, you are giving it a fictional backstory. Suddenly, it doesn’t sound like it was just programmed; it sounds like it was discovered on a long-lost tape. This adds an emotional depth and a tactile quality that listeners connect with on a subconscious level. It’s the digital equivalent of the organic drift we find in analog synth oscillators.
For a hybrid composer, this is a perfect finishing touch. After carefully crafting a sound with a modular rig and recording it into a DAW, a touch of cassette emulation can be the final step that bridges the electronic and the organic. It softens the sometimes-harsh edges of digital audio and places the modular’s futuristic sounds into a familiar, comforting sonic landscape. It is a controlled method of ceding control to a simulated chaos, adding a layer of beautiful imperfection that makes a track feel more human.
Why MPE (MIDI Polyphonic Expression) Is the Future of Synth Playing?
For decades, playing a synthesizer has been a fundamentally different experience from playing an acoustic instrument like a violin or a guitar. A standard keyboard offers a binary, on/off expression for each note (Note On/Note Off, with velocity). You can’t bend an individual note within a chord, or alter its timbre with finger pressure after the initial keypress. MPE (MIDI Polyphonic Expression) shatters this limitation, creating a bridge between the nuanced, continuous control of acoustic instruments and the infinite sonic possibilities of synthesizers.
MPE is a new specification for how MIDI controllers and synthesizers communicate. Instead of sending all performance data—like pitch bend and modulation—on a single MIDI channel, an MPE controller assigns each new note to its own unique MIDI channel. This seemingly simple change is revolutionary. It means that every single note you play can have its own independent expressive control. This unlocks three key dimensions of performance on a per-note basis:
- Slide (Y-axis): Moving your finger up and down on a key can be mapped to any parameter, most commonly filter cutoff or brightness.
- Pressure (Z-axis): Varying the pressure on a key after the initial strike can control parameters like volume, vibrato, or wave-shape.
- Glide (X-axis): Wiggling your finger left and right on a key allows for polyphonic pitch bending—bending one note in a chord while the others remain stable.
For a composer working with modular synths, MPE is a game-changer. It allows you to perform your complex patches with a level of human expressivity that was previously impossible. Imagine controlling the wavefolding amount of a complex oscillator with pressure, while simultaneously sweeping a filter on another note with vertical movement. It transforms a static patch into a dynamic, responsive instrument that feels alive under your fingertips. This elevates the structured conversation with your modular from a series of pre-planned sequences to a real-time, improvisational performance.
Controllers like the ROLI Seaboard or the LinnStrument are pioneering this technology, and more and more software and hardware synths (including many modular systems via CV converters) are adopting MPE. It represents a fundamental shift in how we interact with electronic instruments, moving closer to the goal of making them as expressive and immediate as their acoustic counterparts. MPE is not just a feature; it is the future of virtuosic synth playing.
Key Takeaways
- True creativity with modular synths comes from imposing intentional constraints, not from endless acquisition.
- Treat your modular rig as a collaborator in a « structured conversation, » giving it a specific role within your song.
- Embrace and manage the inherent instabilities of analog gear (like temperature drift) as creative features, not flaws.
Why Buying Vintage Synths Is Risky for New Producers?
The allure of vintage synthesizers is undeniable. They are the sound of legendary albums, their physical presence is iconic, and they promise a « golden era » authenticity that modern instruments often struggle to replicate. However, for a new producer focused on building a stable and efficient workflow, diving into the world of vintage gear can be a risky and expensive proposition. The romance often obscures the harsh realities of maintenance, instability, and poor integration with modern production environments.
Unlike a modern synth that you can plug in and use immediately, a vintage piece is more like a classic car. It requires specialized knowledge, regular servicing, and a willingness to troubleshoot unexpected problems. Components age and fail, leading to costly repairs from a shrinking pool of qualified technicians. Tuning can be unstable, and features we take for granted—like patch memory—are often nonexistent. The creative flow of building a track in a DAW can come to a screeching halt when you have to stop and manually recreate a bass sound you found an hour ago, or when a voice card suddenly goes out of tune.
These challenges can actively work against the goal of finishing music. The time and money spent on keeping a vintage synth operational is time and money not spent on composition and production. While the sonic rewards can be immense, new producers often benefit more from the reliability, flexibility, and seamless integration of modern hardware or software synthesizers. These tools allow you to focus on the music itself, rather than the mechanics of the instrument.
Your Pre-Purchase Audit for Vintage Synths
- Patch Memory & Workflow: Can you save and recall sounds instantly? If not, how will this break your creative flow in a DAW-based session?
- Tuning & Stability: How sensitive is the unit to temperature? Are you prepared for pitch drift and inconsistent behavior between sessions?
- Maintenance & Costs: Research the cost of common repairs for the model. Is there a qualified technician in your area? Budget for unpredictable expenses beyond the initial purchase.
- Polyphony & Limitations: How many voices does it have? Will this restrict the complexity of the chords and arrangements you plan to write?
- Integration & Connectivity: Does it have MIDI, or will you need to invest in a separate CV/Gate converter? How will it integrate with your existing setup?
Now that you understand the philosophical and practical frameworks for integrating your gear, the next step is to act. Start today by choosing one module and giving it a single, defined role in your next track. The path to finished music begins not with a new patch, but with a new mindset.