The romantic « analog warmth » of vintage synths often hides a brutal reality of crippling maintenance costs, workflow-killing failures, and a frustrating hunt for obsolete parts.
- Key components like custom chips are becoming « unobtainium, » requiring expensive or sonically imperfect modern replacements.
- The subtle sonic difference between a pristine original and a reliable modern clone is often completely inaudible in a final mix, making the price premium an exercise in ego.
Recommendation: Prioritize a reliable, modern instrument to finish your music first. Treat vintage gear as a passion project for later, not as your primary production tool.
Every new producer has seen the picture: a dimly lit studio, the warm glow of a vintage synthesizer, and the promise of that elusive « analog warmth. » You’ve been told it’s the secret ingredient, the magic that separates sterile digital tracks from professional, living music. The allure of owning a piece of history—a Juno, a Minimoog, a Prophet—is powerful. It feels like you’re not just buying an instrument, but a muse. You start browsing listings, romanticizing the idea of twisting the same knobs that shaped your favorite records.
But let’s be frank. As someone who has spent decades with his hands inside these « legends, » I’m here to tell you that the dream rarely matches the reality. The hard truth is that you’re not buying a magical music box; you’re adopting a 40-year-old piece of electronics teetering on the edge of failure. The « warmth » you’re chasing is often a symptom of aging components, and the « vibe » is frequently interrupted by crackling pots, unstable tuning, and the soul-crushing silence of a dead voice chip. What if the real key to a great sound isn’t owning a museum piece, but having a tool that actually works when inspiration strikes? This isn’t about crushing dreams; it’s about preventing them from turning into financial and creative nightmares.
This article will pull back the curtain on the unglamorous reality of vintage synth ownership. We will dissect the technical pitfalls, the hidden costs, and the workflow killers that sellers conveniently forget to mention, giving you the information you need to make a smart decision instead of an emotional one.
Summary: Why Buying Vintage Synths Is Risky for New Producers?
- Why « Analog Warmth » Is Often Just Nice Distortion and Roll-Off?
- How to Find Replacement Chips for Synths That Have Been Out of Production for 40 Years?
- Behringer Clone or Original Moog: Is the Sound Difference Audible in a Mix?
- The « Recapping » Error That Destroys Valuable Vintage Circuit Boards
- Sequencing & Planning: A Yearly Maintenance Checklist for Vintage Gear Owners
- Subtractive or Additive: Which Synthesis Style Fits Your Workflow?
- The Wiring Mistake That Creates Constant Buzzing in Your Signal
- How to Integrate an Analog Mixing Console into a DAW Workflow?
Why « Analog Warmth » Is Often Just Nice Distortion and Roll-Off?
Let’s start by demystifying the most overused term in the business: « analog warmth. » New producers imagine it’s a magical quality infused into the circuits. The reality is far more mundane. This coveted « warmth » is often a combination of two things: subtle harmonic distortion from aging components being pushed to their limits, and a natural high-frequency roll-off inherent in older circuit designs. It’s not magic; it’s a pleasant form of degradation. You’re essentially falling in love with the sound of something slowly breaking.
This romanticized decay comes at a steep price. The market is fueled by nostalgia, not logic, with an average price of over $1,400 for top-specimen Junos, a significant jump from a decade ago. You’re paying a massive premium for an instrument whose core appeal is its own instability. This financial commitment puts you on a ticking clock, because as one producer aptly noted, the biggest drawback is the constant threat of failure.
The main downside of them is anything could break any moment using an electronic instrument that’s over 30 years old.
– Jasper Wijnands, Audient Interview on Using Vintage Synthesizers
So, when you buy a vintage synth, you’re not just buying the « warmth. » You’re buying the constant, low-level anxiety that comes with owning a fragile, expensive, and unpredictable machine. That sound you love is the very evidence of its mortality.
How to Find Replacement Chips for Synths That Have Been Out of Production for 40 Years?
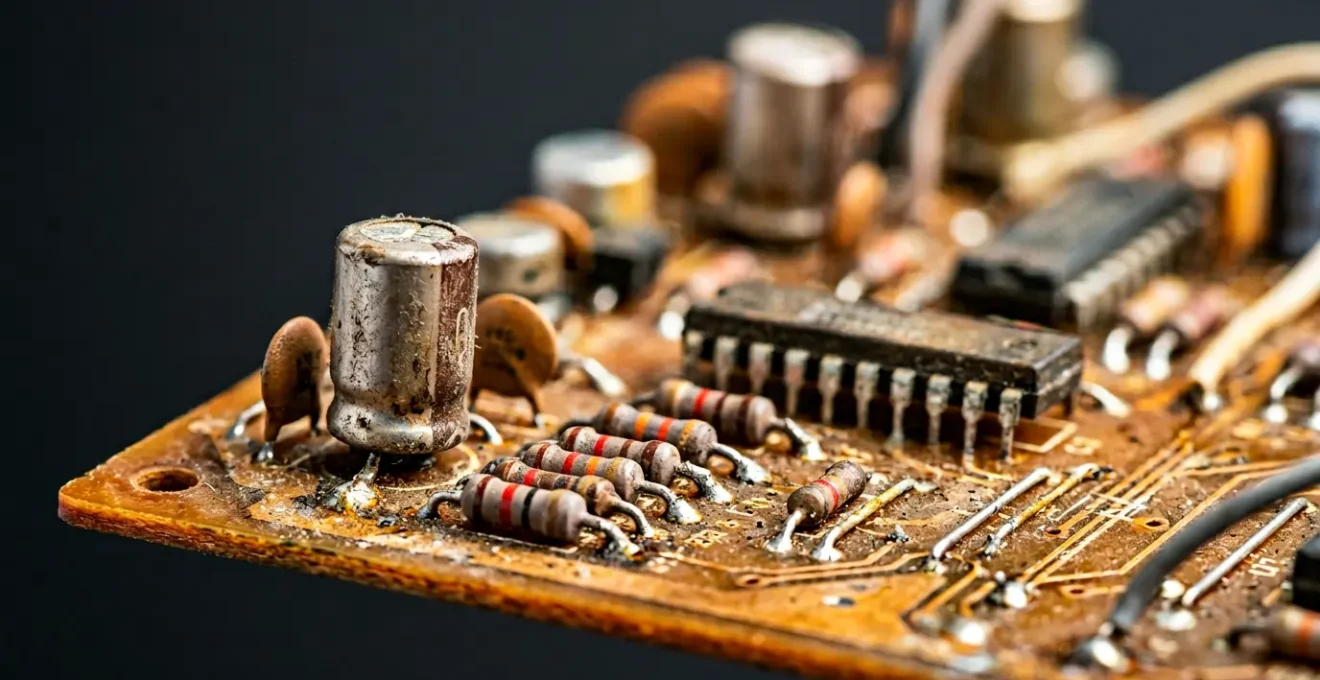
If the general fragility of a 40-year-old instrument doesn’t scare you, let’s talk about specifics. The heart of many classic synths lies in custom-designed integrated circuits (ICs) like the Curtis Electromusic (CEM) or Solid State Micro Technology (SSM) chips. These were the engines that created the legendary sounds of the Prophet-5, Oberheim OB-Xa, and Polysix. The problem? Most of these companies have been defunct for decades, and their chips are now what we in the repair world call « unobtainium »—they simply don’t make them anymore.
When one of these chips fails, your synth doesn’t just get a bit wonky; a voice goes completely dead. Your polysynth is now a less-poly synth. Sourcing a replacement means trawling eBay for « New Old Stock » (NOS) parts at exorbitant prices or, worse, pulling a chip from another « donor » synth, effectively cannibalizing one piece of history to save another. While there has been some progress in this area, the very need for it highlights the severity of the problem.
Case Study: The Resurrection of the CEM3340 Chip
The scarcity of vital chips became so critical that it created a new market. A successful effort to remanufacture the legendary CEM3340 VCO chip began in 2016. Because the original patents had expired, companies like Cool Audio were able to create modern, reliable clones (like the V3340). This was a lifeline for synths that were otherwise destined for the scrap heap, but it proves the point: the original parts are gone, and you’re now relying on a small ecosystem of boutique manufacturers to keep your investment from becoming a brick.
This is why finding a trustworthy technician is non-negotiable. An amateur can easily destroy your synth, but a pro will know the landscape of these replacement parts. Before you hand over your prized possession, you need to vet them thoroughly.
Your Action Plan: Vetting a Vintage Synth Technician
- Have you worked on this specific model before? Ask for examples of similar repairs.
- What’s your policy on sourcing parts? Verify they have access to reliable NOS or quality clone chips.
- Can you provide references from other vintage synth owners? Check their track record.
- What’s your warranty policy on the repair work? Ensure you’re protected against recurring failures.
- Do you have the service manual and schematics for this model? This confirms they have the tools for a proper diagnosis.
Behringer Clone or Original Moog: Is the Sound Difference Audible in a Mix?
This is where the purists get angry, but it’s a question that must be asked: can you actually hear the difference? We’re not talking about playing the synth in a silent room with studio headphones, obsessing over minute filter variations. We’re talking about a real-world scenario: in a dense mix, with drums, bass, vocals, and effects. Is the magic of that original Moog still apparent, or does it get lost in the noise?
Frankly, for 99% of listeners, the answer is no. Modern analog clones have become astonishingly accurate. They use the same fundamental architecture and often nearly identical components, but with the massive advantages of modern manufacturing: stability, reliability, and features like MIDI and USB integration. This is what I call the « audible delusion »—paying a colossal premium for a sonic nuance that disappears the moment you add a kick drum.
The price gap is staggering and impossible to justify from a purely practical standpoint. A Behringer Model D can be had for around $299, while an official Moog Minimoog reissue costs $3,749. You could buy a dozen clones for the price of one original. That’s a dozen more layers for your track, a dozen more creative possibilities, all while the original sits in the corner, waiting for its next expensive trip to the repair shop. For a new producer, the choice should be about what facilitates making music, not what looks best on Instagram.
For a new producer, the clone’s reliability, modern integration (USB, MIDI), and preset memory provides a superior workflow for finishing music.
– Starsky Carr, Behringer Model 15 vs Moog Grandmother Comparison
The clone isn’t a « lesser » instrument; it’s a smarter one. It delivers the sound you want without the baggage of being a 40-year-old antique. It’s a tool designed for work, not a museum piece that requires constant worship.
The « Recapping » Error That Destroys Valuable Vintage Circuit Boards
If you spend any time on synth forums, you’ll hear the term « recapping » thrown around as a magic cure-all for aging electronics. The advice is ubiquitous: « Just recap it, and it’ll be good as new! » This is dangerously simplistic and has led to the destruction of countless valuable instruments. Recapping, or replacing old electrolytic capacitors, isn’t like changing the oil in your car. It’s more like performing open-heart surgery, and giving the scalpel to an amateur is a recipe for disaster.
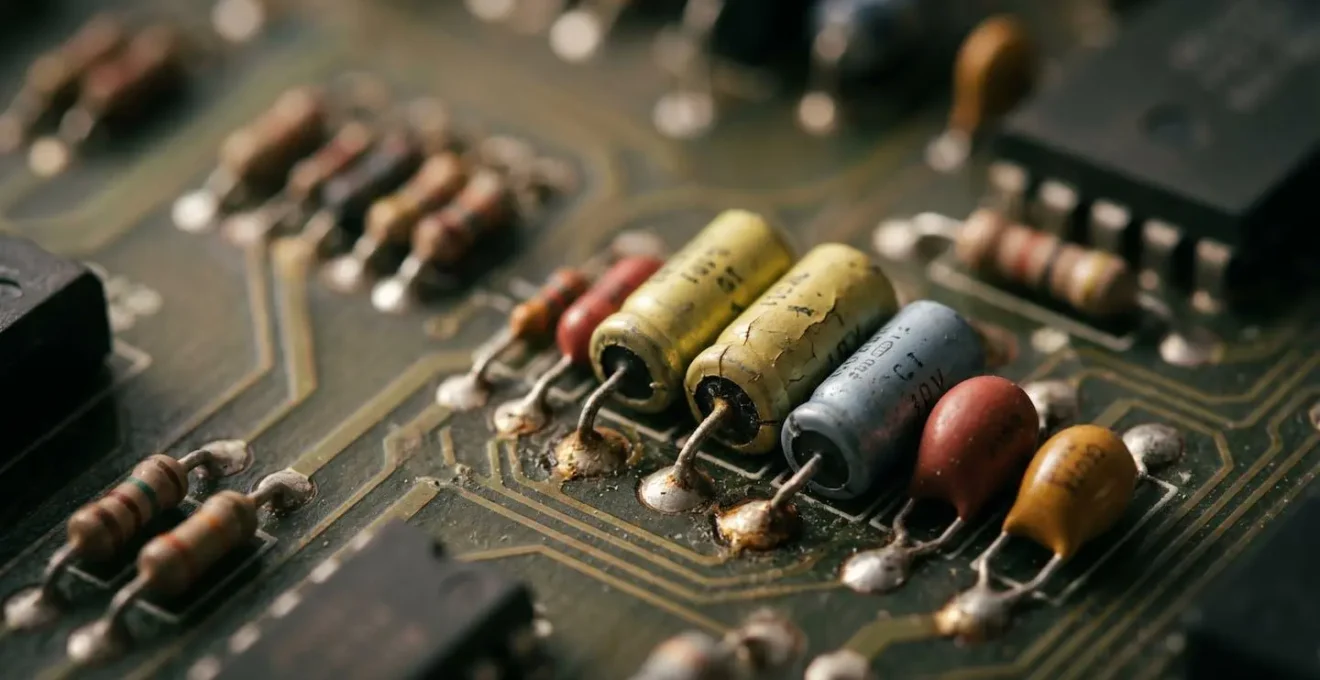
The biggest error is the « shotgun » approach: replacing every single capacitor on the board. This is the « Recapping Myth. » Different types of capacitors age differently. While electrolytics do have a finite lifespan, other types like ceramic or film caps can last virtually forever. A clumsy technician with a soldering iron can easily lift delicate traces off the circuit board, install a new cap with the wrong polarity (turning it into a tiny bomb), or use a cheap, out-of-spec replacement that alters the synth’s sound for the worse. The goal of a restoration is to replace only what is necessary, starting with the components most likely to cause catastrophic failure.
As experts in vintage synth restoration will tell you, some capacitors are far more dangerous than others when they fail. The priority is not a wholesale replacement, but a strategic one. According to a discussion among restoration experts, tantalum capacitors are a major risk.
Tantalums can short out when they fail, which can lead to damage especially in power supplies.
– Vintage Synth Restoration Expert, Vintage Synth Explorer Forum Discussion
A proper restoration follows a strict hierarchy of replacement to ensure stability and preserve the instrument’s integrity. It is not a task for the weekend hobbyist. Here’s a look at a professional’s priority list:
- Priority 1: Electrolytics with visible leakage or bulging. These are actively failing and must be replaced immediately.
- Priority 2: All tantalum capacitors. They can short out upon failure, potentially destroying power supplies or other critical components.
- Priority 3: Electrolytics in the power supply section. A failure here can take the whole instrument down.
- Never Replace (Unless Damaged): Ceramic, metal-film, or polypropylene capacitors. They are extremely stable and replacing them is unnecessary and risky.
Sequencing & Planning: A Yearly Maintenance Checklist for Vintage Gear Owners
Owning a vintage synth isn’t a one-time purchase; it’s an ongoing financial and time commitment. This is the concept of financial entropy: your instrument is in a constant state of decay, and you must continually invest resources just to keep it functional. A new producer, excited by the initial purchase, often fails to budget for this long-term reality. The costs can add up quickly, turning your dream synth into a money pit that drains both your bank account and your creative energy.
The volume of failing instruments is a growing problem. For instance, one Toronto repair shop’s data showed 444 instruments repaired in a single year, a significant increase from previous years, highlighting just how many of these « legends » are actively breaking down. To avoid becoming another statistic, you need a disciplined maintenance plan. This isn’t just about fixing things when they break; it’s about preventative care to extend the life of your investment and catch small problems before they become catastrophic failures.
A realistic maintenance schedule involves a mix of DIY tasks and professional servicing. The following breakdown illustrates the kind of long-term planning required, a far cry from the « plug and play » experience of modern gear.
| Maintenance Task | Frequency | Skill Level Required | Estimated Cost |
|---|---|---|---|
| Visual inspection and dusting | Weekly | Beginner | $0 (cleaning cloth) |
| Contact cleaner on pots/sliders | Monthly | Beginner | $20 (DeoxIT can) |
| Tuning and calibration check | Quarterly | Intermediate | $0-150 (DIY or tech) |
| Battery replacement (memory backup) | Yearly | Intermediate | $5-90 (parts + labor) |
| Professional calibration service | Yearly | Pro Only | $150-300 |
| Full capacitor replacement (recap) | Every 10-15 years | Pro Only | $500-1,500+ |
This table doesn’t even account for emergency repairs, like a failed voice chip or a dead power supply, which can easily add hundreds more to your yearly cost of ownership. The romance fades quickly when you’re staring at a four-figure repair bill.
Subtractive or Additive: Which Synthesis Style Fits Your Workflow?
Beyond the hardware failures and maintenance costs, there’s a creative consideration that new producers often overlook: workflow limitations. Vintage synths are revered for their « simple » and « immediate » interfaces, but this simplicity often comes at the cost of profound functional constraints. You might be buying into a famous sound, but you’re also buying into a very rigid and limited way of creating it.
Many iconic synthesizers, for all their character, are remarkably feature-poor by modern standards. This isn’t a matter of opinion; it’s a technical fact. Their perceived « simplicity » is often a direct result of their architectural limitations. As an analysis of vintage synth designs points out, these limitations can be severe workflow killers for a modern producer accustomed to more flexibility.
Case Study: The Built-In Limitations of Legends
Consider the Roland Juno-106: it’s famous for its lush chorus and easy interface, but it only has a single LFO and a single envelope. This severely restricts your modulation possibilities. The Korg MS-20 is a semi-modular powerhouse, but its oscillators famously lack pulse width modulation (PWM), a fundamental tool for creating evolving timbres. The legendary Minimoog? To use its LFO for modulation, you have to sacrifice one of its three precious oscillators, turning your fat-sounding synth into a much thinner one. These aren’t « charming quirks »; they are hard-coded creative dead ends.
Modern synthesizers, in contrast, are often multi-engine powerhouses. A single contemporary synth might offer subtractive, additive, wavetable, and FM synthesis all in one box, with a deep modulation matrix that lets you route anything to anything. They are designed not just as instruments, but as educational tools for sound design. As one editorial bluntly puts it:
If complicated synthesis is important to you, stick with modern instruments.
– Gearnews Editorial Analysis, Why You Shouldn’t Buy Vintage Synths Article
For a new producer trying to learn the ropes of sound design, a vintage synth can be a terrible teacher. It forces you into a creative box, whereas a modern instrument gives you the tools and the freedom to explore the entire landscape of synthesis.
The Wiring Mistake That Creates Constant Buzzing in Your Signal
You’ve finally done it. You spent a small fortune on your dream vintage synth, hooked it up, and… there it is. A constant, infuriating 60-cycle hum buzzing through your speakers. This is one of the most common and maddening workflow killers a new vintage owner will face. You’re ready to create, but instead, you’re forced to become a forensic audio engineer, hunting down the source of a noise that seems to have no cause.
The issue often lies in ground loops, impedance mismatches, or poorly shielded internal power supplies—all hallmarks of 1970s and ’80s electronics. Vintage synths with unbalanced outputs are notoriously susceptible to noise when connected to modern, balanced studio gear. The problem can even come from something as simple as the USB cable connecting your modern audio interface to a computer, introducing digital noise into your pristine analog signal path. Before you even think about internal repairs, you need a systematic process to isolate the problem.
Here is a logical flowchart for diagnosing signal noise, starting with the simplest solutions and moving to the more complex. Following these steps can save you hours of frustration:
- Isolate the Synth: Disconnect everything except for power and headphones plugged directly into the synth. If the buzz is still there, the problem is internal to the synth itself.
- Check the Power Plug: If you have a 2-prong power plug, try flipping it 180 degrees in the socket. This can sometimes resolve a simple ground loop.
- Test for AC Ground Loops: Connect the synth only to an audio interface powered by a laptop running on battery (unplugged from the wall). If the buzz disappears, you have a ground loop in your home’s AC wiring.
- Test the USB Connection: With the laptop still on battery, connect the USB cable. If the buzz appears now, you’ve identified a USB ground loop as the culprit.
- Use a DI Box: Run the synth’s unbalanced outputs through a Direct Injection (DI) box before they hit your interface. This properly matches the impedance and can eliminate a lot of noise.
If the buzz persists after all these steps, the problem is almost certainly internal, likely a failing power supply, which requires professional repair. This entire frustrating exercise is a tax on your creativity that owners of modern, properly designed gear simply never have to pay.
Key Takeaways
- « Analog warmth » is an often-misunderstood byproduct of aging components, not a magical feature, and comes with inherent instability.
- The total cost of ownership for a vintage synth extends far beyond the initial purchase price, encompassing a regular budget for maintenance, calibration, and sourcing rare parts.
- For new producers focused on finishing music, a reliable modern clone offers over 95% of the sound with none of the technical baggage, making it a smarter and more productive choice.
How to Integrate an Analog Mixing Console into a DAW Workflow?
The final frontier of vintage romanticism isn’t just a synth, but an entire analog workflow, often centered around a large-format mixing console. The dream is to mix « out of the box, » running your tracks through analog EQs and faders for that cohesive « glue. » However, like with synths, this dream ignores a mountain of technical and financial hurdles. Integrating a massive piece of 40-year-old electronics into a modern Digital Audio Workstation (DAW) is a complex and expensive engineering project, not a simple creative choice.
The first hidden cost is I/O. To get individual tracks out of your DAW and into the console, you need a high-end audio interface with dozens of outputs. To get them back in, you need one with dozens of inputs. These high-end multi-channel converters can cost thousands of dollars, often more than the « bargain » price of the old console itself. You’ll also need hundreds of dollars in cabling, a patchbay to manage routing, and enough physical space to house a piece of furniture the size of a dining table. And we haven’t even touched on the maintenance of the console itself—scratchy faders, dead channels, and a failing power supply are all but guaranteed.
Case Study: Smart Hybrid Alternatives
For producers seeking analog character without the overwhelming complexity, modern hybrid solutions offer a far more practical path. Instead of a full console, you can invest in a high-quality summing mixer. This allows you to send stems out of your DAW to be combined in the analog domain, imparting analog cohesion without the channel-by-channel maintenance nightmare. Another option is to use one or two high-end channel strips for processing key tracks like vocals or bass. These modern units provide authentic analog processing with the reliability and convenience of new gear, giving you the best of both worlds at a fraction of the cost and space.
This hybrid approach allows you to focus on what matters: making music. It delivers the tangible benefits of analog processing without forcing you to become a part-time studio technician. It’s a pragmatic solution that prioritizes creativity over a romantic but ultimately impractical workflow.
Ultimately, the choice is yours, but it should be an informed one. Evaluate your actual needs as a musician and producer before investing your time and money in a high-maintenance museum piece that may spend more time on a repair bench than in your creative workflow.