The secret to a massive, heavy guitar tone isn’t more gain—it’s more precision and less saturation.
- Aggressive guitar tones that sound huge in a mix rely on clarity and dynamic headroom, which are often destroyed by excessive distortion.
- Surgical EQ, strategic layering, and component-level gear choices are non-negotiable for separating your guitars from a « fizzy, powerless mosquito » sound.
Recommendation: Turn your gain knob down by 20% on your next session and focus on a harder picking attack. The clarity you gain is the foundation of true heaviness.
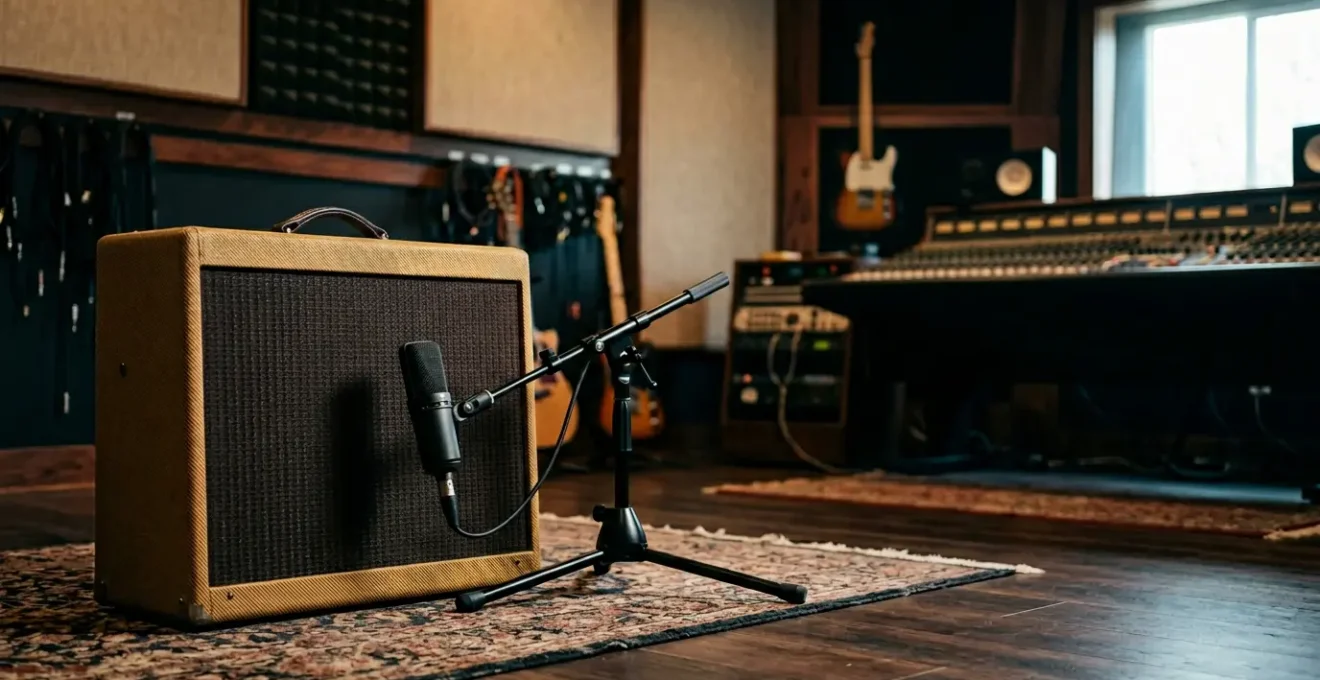
You’ve spent hours dialing it in. The amp is screaming, the gain is cranked, and in the room, your guitar sounds like a weapon of mass destruction. Then you hit record. In the context of the full mix, with drums pounding and bass thundering, your god-killer tone has vanished. What’s left is a fizzy, powerless mosquito buzz, completely buried and devoid of impact. This is the most common and frustrating problem for any metal guitarist. You instinctively reach for more gain, more volume, more layers—and the problem only gets worse. The mix becomes a muddy, incoherent wall of noise.
The conventional wisdom to just « scoop the mids » or « quad-track everything » is lazy, outdated, and the very reason your recordings sound small. Forget what you think you know. True heaviness in modern production isn’t about brute force. It’s about surgical precision. It’s about creating space, controlling saturation, and understanding that what you *don’t* play is as important as what you do. This isn’t a list of cheap tricks; it’s a change in philosophy. It’s about thinking like a producer, not just a player.
This guide will dismantle the common mistakes that are choking your guitar tone. We will dissect the science of gain staging, the art of layering, the critical relationship between guitar, bass, and drums, and the gear choices that separate amateur fizz from professional-grade aggression. Prepare to deconstruct your process and rebuild it with a foundation of precision. This is how you capture guitars that don’t just participate in the mix—they command it.
Table of Contents: A Producer’s Playbook for Heavy Guitars
- Why Using Less Gain Actually Makes Your Guitars Sound Heavier?
- Quad Tracking or Double Tracking: Which Yields a Tighter Wall of Sound?
- Triggering or Natural: How to Blend Samples with Live Drums?
- The « Scooped Mids » Mistake That Makes the Bass Disappear
- Problem & Solution: Screaming Without Coughing Blood
- The Speaker Cable Mistake That Blows Up Output Transformers
- How to Decompress Your Voice After a 2-Hour Screaming Rock Set?
- How to Upgrade a Budget Solid-Body Guitar to Pro Standards?
Why Using Less Gain Actually Makes Your Guitars Sound Heavier?
Let’s start with the biggest heresy in metal: your gain knob is your enemy. The quest for « heaviness » often leads guitarists to crank the distortion to its maximum, believing more saturation equals more power. This is fundamentally wrong. Excessive gain compresses the signal to death, obliterating the very things that make a guitar sound powerful: transient attack and dynamic range. Your pick attack—that percussive « thwack » on the string—gets buried under a blanket of fizz. The difference between a softly played note and a hard-hit chord vanishes, resulting in a flat, lifeless performance.
The producer’s approach is to treat gain as a tool for texture, not a blunt instrument for volume. By dialing the gain back, you reintroduce headroom into your signal. This allows the natural dynamics of your playing to shine through. A powerful palm mute will have a sharp, percussive impact, while an open, ringing chord will have space to breathe. As legendary metal producer Andy Snead puts it, « If you can wind the gain down and play hard, you’ll get a better clarity to your sound. » This clarity is what allows your guitar to cut through a dense mix instead of just adding to the mud.
Your goal is a tone that is tight and articulate. A good starting point for recording is to aim for peak levels between -18 dBFS and -12 dBFS in your DAW. This leaves plenty of headroom for the mixing and mastering stages. The perceived heaviness will come from a tight performance, precise EQ, and the powerful interplay with the bass and drums—not from a single knob turned to ten. Stop chasing a wall of noise and start sculpting a weapon of precision.
Quad Tracking or Double Tracking: Which Yields a Tighter Wall of Sound?
The « wall of sound » is the holy grail of metal production, and layering guitars is the primary method to achieve it. The standard is double tracking: recording the same guitar part twice, panned hard left and right. This creates a wide, thick stereo image. Inevitably, the question arises: if two tracks are good, aren’t four (quad tracking) better? The answer is a hard « maybe, » and if you get it wrong, you’ll destroy your mix’s integrity.
The power of double tracking comes from the subtle, near-microscopic differences in timing and pitch between the two performances. These imperfections create a natural chorus effect that adds width and size. Quad tracking—two unique parts panned left, two panned right—attempts to multiply this effect. However, it also multiplies the potential for error. Every slight timing inconsistency is now quadrupled, which can quickly turn a « tight wall » into a blurry, phase-y mess. As producer Romesh Dodangoda notes, if guitar parts are rhythmically complex, « it’s best to maybe stick to double-tracking so you keep the clarity rather than having four guitars playing things at slightly different times. »

The transient detail captured in each take is paramount. For quad tracking to work, the performance must be absolutely machine-like in its precision. This is an area where only the most elite players can succeed without extensive editing.
Case Study: The Meshuggah Anomaly
Analysis of the recording techniques of the band Meshuggah shows an extreme approach, sometimes using four or five different amps for four distinct guitar tracks per side. This creates an unbelievably dense and complex texture. However, this method is only viable because the band’s rhythmic precision is legendary and inhumanly tight. For 99% of musicians, attempting to replicate this will result in a loss of attack and a rhythmically ambiguous sound, proving that clarity is a direct result of performance precision, not the number of layers.
The professional verdict is clear: start with a perfect double track. A tight, well-performed stereo pair will always sound bigger and more powerful than four sloppy, loose takes. Only consider quad tracking for simple, sustained chord sections where timing is less critical, or if you possess the rhythmic discipline of a cyborg.
Triggering or Natural: How to Blend Samples with Live Drums?
Your guitars don’t exist in a vacuum. Their entire purpose is to lock in with the rhythm section to create a cohesive, driving force. In modern metal, that rhythm section is often a combination of live drums and triggered samples. The relationship between your guitar’s rhythm and the kick and snare is everything. If they aren’t perfectly synchronized, the entire foundation of your track feels weak and unprofessional.
One of the most effective producer techniques to enforce this lock-step relationship is sidechain gating. This isn’t about replacing your drummer; it’s about using the drummer’s performance to control the guitar’s rhythm. By inserting a noise gate on your rhythm guitar track and « keying » it from the kick drum, you can make the guitar’s signal « duck » or open in perfect time with the drums. It creates micro-gaps in the guitar riff that allow the transient of the kick drum to punch through the mix with absolute clarity. As engineer Craig Anderton explains, you can « Gate a bass so that notes hit exactly when the kick drum hits. Or cause level variations in power chords that track the drums’ dynamics. »
This technique turns your rhythm guitars and drums into a single, percussive machine. It’s the secret behind the impossibly tight, machine-gun rhythms of modern metal. Here’s a basic setup in your DAW:
- Insert a noise gate plugin on your rhythm guitar bus.
- Set the gate’s sidechain/key input to receive the signal from your kick drum track (or snare, for backbeats).
- Set the threshold so the gate opens reliably with every drum hit.
- Adjust the attack and release times so the gate opens and closes cleanly, creating a tight rhythmic pulse without audible clicking.
- Use the gate’s range/floor control to determine how much the guitar signal is reduced between drum hits.
This isn’t about silencing the guitars, but about creating a subtle, rhythmic « breathing » that carves out space for the drums. When done right, the effect is felt more than heard. The entire low-end of your mix will feel tighter, more focused, and infinitely more powerful.
The « Scooped Mids » Mistake That Makes the Bass Disappear
Here it is: the most pervasive and destructive piece of advice in metal guitar history. « Scoop your mids. » For decades, guitarists have been turning their midrange EQ knob all the way down, thinking it creates a heavy, brutal tone. In isolation, it might sound appealing. In a mix, it’s a sonic black hole that guarantees your guitar will have zero presence and will actively fight your bass guitar for space.
The midrange frequencies are where a guitar’s character, body, and aggression live. It’s the range our ears are most sensitive to. When you scoop the mids on your guitar, you create a « hole » in the exact frequency range (roughly 400Hz – 1.5kHz) that the bass guitar needs for its own articulation and definition. The result? The bass player’s notes become an indistinct low-end rumble, and your guitar, now just fizz (highs) and boom (lows), has no voice to cut through the cymbals and kick drum. You’ve created two instruments that are fighting for the same sonic territory, and both are losing.

A professional mix treats the frequency spectrum like real estate. Each instrument must have its own « slot. » Instead of scooping, think about surgical carving. A common strategy involves a high-pass filter on the guitars (cutting everything below 80-100Hz) to leave the sub-bass frequencies exclusively for the kick and bass guitar. Then, a small, surgical cut in the guitars around 200-300Hz can open up a pocket for the fundamental of the bass to sit in. In return, the bass guitar might get a boost in its high-mids (1.5kHz-4kHz) to bring out the « clank » and string noise, allowing it to be heard on smaller speakers without interfering with the guitar’s body.
This is what « cutting through the mix » actually means. It’s not about being louder; it’s about occupying a unique frequency space where you aren’t fighting other instruments. According to a professional mixing engineers’ strategic frequency map, the low-mids of the guitar and the high-mids of the bass are critical zones that must be managed, not eliminated. Your midrange is not your enemy; it’s your greatest weapon.
Problem & Solution: Screaming Without Coughing Blood
In a dense metal mix, the lead vocal is in a constant battle for survival. Its primary competitor for sonic real estate is the wall of distorted guitars. Both live in the same critical midrange frequencies (1kHz – 4kHz), the area responsible for presence and intelligibility. The amateur move is to simply turn the vocals up, which often makes them sound disconnected and « on top » of the mix, or to carve a giant hole in the guitars with EQ, weakening their impact. This is the mix equivalent of screaming until you’re hoarse—all effort, no effective result.
The professional solution is surgical and dynamic. You don’t want to permanently weaken your guitar tone; you only want it to politely step aside *when the vocalist is singing*. This is the perfect application for dynamic EQ or a multiband compressor. As the experts at iZotope state, « The drums [or in this case, guitars] will only duck down in those particular frequency-bands whenever the vocals are strong enough to trigger them. » It’s an automated, transparent way to create a « pocket » for the vocal to sit in.
This technique ensures the guitars retain their full power and aggression during instrumental sections but dynamically create space for the vocal to cut through with perfect clarity during the verses and choruses. It’s the ultimate « have your cake and eat it too » mixing strategy. Here’s the vocal pocket strategy:
- Identify the core frequency range where the vocals and guitars clash (usually 1kHz to 4kHz).
- Place a dynamic EQ plugin on your main guitar bus.
- Route your lead vocal track to the sidechain input of the dynamic EQ.
- Configure a band on the EQ targeting that 1-4kHz range.
- Set this band to reduce the level by a subtle 2-3dB, but *only* when the vocal signal is present.
- Fine-tune the attack and release times so the EQ’s « ducking » action sounds natural and invisible, tracking the vocal phrasing.
When executed properly, you won’t « hear » the EQ working. You’ll simply perceive a mix where the vocals sound effortlessly clear and present, and the guitars sound massive and unrelenting. It’s the definition of a polished, professional metal production.
The Speaker Cable Mistake That Blows Up Output Transformers
We’ve focused on the digital and performance aspects, but your physical gear chain is just as critical. The connection between your amplifier head and your speaker cabinet seems simple, but it’s a common point of failure that can not only ruin your tone but also destroy your expensive gear. Using the wrong type of cable or creating an impedance mismatch is a cardinal sin in the world of tube amps.
First, the basics: never, ever use a standard instrument cable to connect an amp head to a cabinet. Instrument cables are shielded and use a very thin gauge of wire designed for a low-power, high-impedance signal. A speaker cable is unshielded and uses much thicker wire, designed to handle high power and low impedance. Using an instrument cable for this job will, at best, throttle your tone and, at worst, melt the cable and potentially damage your amp’s output transformer—an expensive and catastrophic failure.
Equally important is the impedance match. Your amp head has an output impedance (e.g., 4, 8, or 16 ohms), and your speaker cabinet has a load impedance. These must match. Connecting a 16-ohm cabinet to an amp’s 8-ohm output tap, for example, creates a mismatch that doesn’t just pose a risk to your gear; it actively changes your tone.
Case Study: How Impedance Mismatch Kills Tone
Professional audio engineering analysis shows that a speaker impedance mismatch directly alters the amplifier’s frequency response. Running a higher impedance cab than the amp expects can soften high-end frequencies and change the midrange character, neutering the « cut » needed for high-gain guitars. Furthermore, the quality and length of your speaker cable affect the « damping factor »—the amp’s ability to control the speaker cone’s movement. A thick, short, high-quality speaker cable provides a better damping factor, resulting in a tighter, more immediate low-end response. This is absolutely critical for the precise, staccato palm-muting common in metal.
Don’t let a fifty-cent mistake cost you a thousand-dollar amp or compromise the tight low-end you’ve worked so hard to achieve. Check your cables. Match your impedance. It’s a non-negotiable step for any serious musician.
Key Takeaways
- True heaviness comes from clarity and precision, not maximum gain.
- A perfect double track is always better than a sloppy quad track.
- The midrange is a guitar’s voice; scooping it is a critical mistake that kills mix presence.
How to Decompress Your Voice After a 2-Hour Screaming Rock Set?
As a producer, your vocalist is an instrument. A very sensitive, very expensive-to-replace instrument. A two-hour session of aggressive vocals is like a marathon for the vocal cords. If your singer walks out of the booth and into a cold night without a proper cool-down, you risk losing them for tomorrow’s session. Vocal health isn’t some luxury; it’s a professional necessity. You need to enforce a cool-down protocol with the same seriousness you apply to tuning a guitar.
The goal after a heavy session is to gently decompress the vocal folds, reduce swelling, and promote recovery. Shouting is over; now is the time for quiet and gentle care. The first and most important rule is vocal rest. This means no talking, no whispering (which is often worse than talking), and absolutely no more singing for at least an hour post-session. Silence is the fastest path to recovery.
Hydration is the next pillar. The vocalist should have been drinking room-temperature water throughout the session, and they need to continue afterward. Avoid dehydrating substances like alcohol or excessive caffeine. To actively help the vocal cords recover, introduce them to straw phonation. This involves humming gently through a narrow straw, either into the air or into a glass of water (creating bubbles). This technique creates back-pressure that gently massages the vocal folds, reduces swelling, and helps them reset to a neutral state. It’s the physical therapy of the vocal world.
A cool-down routine should be simple and brief. Five minutes of gentle humming from the top of their range down to the bottom, followed by five minutes of straw phonation, can make a world of difference. As a producer, it’s your job to build this time into the schedule. A vocalist who takes care of their voice is a vocalist who can deliver killer takes, day after day. A vocalist who doesn’t is a liability.
How to Upgrade a Budget Solid-Body Guitar to Pro Standards?
Your signal chain starts at your fingertips, but the first piece of electronic equipment it hits is your guitar. No amount of mixing prowess or expensive amplification can fix a guitar that won’t stay in tune or is plagued by noise. While a high-end instrument is a joy to play, you can elevate a budget solid-body guitar to professional recording standards with a few strategic, high-impact upgrades. It’s not about brand names; it’s about stability, clarity, and reliability.
Before you even think about tone, you must address tuning stability. If your guitar can’t hold its tuning through a single take, it’s useless for double tracking. The single most important upgrade is a set of high-quality locking tuners. They make string changes faster and, more importantly, lock the string down at the post, eliminating slippage—the primary cause of tuning issues. Combine this with a properly cut nut (graphene or TUSQ) and a stable bridge, and your guitar will be rock-solid.
Case Study: Why Pro-Grade Pickups Aren’t Always « High-Output »
The instinct is to drop the hottest, highest-output pickups you can find into a budget guitar. However, producers and session players often find that ultra-hot pickups pre-compress the signal, smearing the pick attack and reducing articulation. This is the exact opposite of what you need for a tight, modern high-gain tone. Medium-output, « vintage-hot » PAF-style humbuckers actually preserve the transient attack and offer clearer note definition. This gives you, the producer, far more control, allowing you to add gain and saturation with pedals or plugins in a more deliberate and controlled manner.
Once your guitar is stable and tonally flexible, the final frontier is noise. Budget guitars often have poor shielding in their control cavities, making them susceptible to 60-cycle hum and RF interference. Lining the cavity with copper tape and ensuring a solid ground connection will make your guitar dead silent—a non-negotiable trait for professional DI recording.
Your Action Plan: The Recording-Ready Guitar Audit
- Tuning Stability Check: Install locking tuners. Play a full song with aggressive bends and check tuning. If it slips, the problem is likely the nut or bridge. This is your first point of failure.
- Sustain & Definition Inventory: Record a single, sustained power chord. Does it ring out clearly or die quickly? Upgrading to a high-mass bridge can significantly improve sustain and note definition. Collect before-and-after recordings.
- Noise & Interference Audit: Plug into a high-gain amp. Without touching the strings, turn up the volume. If you hear excessive hum, your guitar needs better shielding. Shielding the control cavity with copper tape is a mandatory step.
- Connection Integrity Test: Wiggle the cable at the output jack. Is there any crackling? A cheap output jack is a guaranteed point of failure. Replace it with a premium Switchcraft model for a bulletproof DI connection.
- Pickup Articulation Analysis: Record a series of fast, palm-muted, single-note riffs. In the recording, can you hear the individual pick attack on each note, or is it a muddy blur? If it’s muddy, your high-output pickups are likely the problem. Consider medium-output alternatives for better transient response.
You now have the philosophy and the practical tools. The path to a massive guitar sound is paved with precision, control, and a willingness to defy conventional « wisdom. » Stop blaming your gear and start thinking like a producer. Apply these principles to your next recording session, and you will hear the difference. Your guitars will be bigger, punchier, and for the first time, they will truly command the mix.